Hey everyone, and welcome back to My Weird Prompts. I am Corn, and I am joined as always by my brother.

Herman Poppleberry at your service. And today, we are diving into the world of precision engineering, or at least, the tools that make it possible for us mere mortals to interact with it.
It is funny you say that, because Daniel's prompt today really hit home for me. He has been working on upgrading his C-P-U cooler, which sounds like a straightforward task on paper. You buy the cooler, you apply the thermal paste, you screw it down. But it is never that simple, is it? He described being three inches deep into a dark computer case, trying to reach a mounting screw that seems determined to strip itself out of existence.
The struggle is real, Corn. There is nothing quite like that sinking feeling in your gut when you feel the screwdriver tip slip just a tiny bit. It is that tactile "pop" followed by a gritty sensation, and you know instantly that you have just rounded off the edges of a tiny, proprietary screw. It is the stuff of nightmares for anyone who enjoys tinkering, because once that head is gone, you are looking at a very stressful afternoon with a drill or a pair of needle-nose pliers.
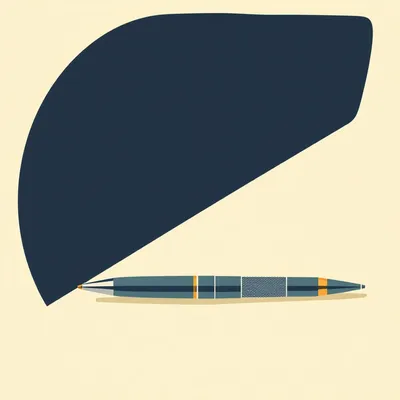
Exactly. Daniel is tired of the "bargain bin" experience. He is looking for the good stuff. He wants a professional-grade precision screwdriver set, an electrostatic discharge mat—or E-S-D mat—and some real-world solutions for those tight, awkward spaces inside a desktop. He specifically mentioned T-twenty, M-two, and M-three heads, and he is tired of low-quality tools that do more damage than good.
I love this topic because it is one of those areas where spending a little more money upfront saves you an incredible amount of frustration and potentially hundreds of dollars in damaged components later. When you are working on a motherboard or a high-end graphics card, the margin for error is essentially zero. One slip can sever a trace on the P-C-B, and suddenly your two-thousand-dollar rig is a very expensive paperweight.
So, let us start with the big question, Herman. Why do cheap screwdrivers strip screws? I think most people assume it is just their own fault, like they did not push hard enough or they had the wrong angle, but there is a lot of actual physics and material science involved here, right?
Oh, absolutely. It really comes down to two main factors: tolerances and metallurgy. Let’s talk metallurgy first. Cheap screwdriver sets, like the ones you might find at a checkout counter or in a generic home toolkit, are often made of soft, low-grade carbon steel. When you apply torque to a stubborn screw, the metal of the screwdriver tip actually deforms. It is softer than the screw itself sometimes! Once that tip loses its sharp, precise edges, it can no longer grip the screw head properly.
And that is where the slipping happens.
Right. We call that cam-out. It is especially common with Phillips head screws because, believe it or not, they were actually designed to cam-out. Back in the early industrial days, they wanted the tool to slip out of the screw to prevent over-tightening on assembly lines. But in precision electronics, you want the exact opposite. You want a perfect, snug fit. High-quality tools use much harder alloys, like S-two tool steel or chrome-vanadium-molybdenum steel. These materials are heat-treated to a specific Rockwell hardness—usually around fifty-eight to sixty-two H-R-C—so they can withstand that torque without deforming.
And then there is the tolerance issue you mentioned. I am guessing that is about how well the tool actually fits the hole?
Exactly. If the screwdriver tip is even a tenth of a millimeter off in its dimensions, it is not sitting flush. That tiny gap is all it takes for the force to be concentrated on the very tips of the corners of the screw head instead of being distributed across the whole surface area. A professional-grade tool from a brand like Wiha or Wera is machined to incredibly tight tolerances. When you put a Wiha Phillips double-zero into a high-quality screw, it almost feels like they are magnetically locked together even before you apply a magnet. It is a mechanical "seat" that feels solid.
That is a great point. Daniel mentioned M-two and M-three heads, but I think we should clarify something for the listeners. M-two and M-three actually refer to the metric thread size of the screw, not the drive type.
Good catch, Corn. This is a common point of confusion. An M-two screw means it has a two-millimeter major diameter on the threads. Usually, an M-two or M-three screw in a computer will have a Phillips number zero or a Phillips number one head. Sometimes you will see them with a small hex or Torx drive, especially in laptops or high-end cases. For a desktop computer, you are mostly looking at Phillips and Torx. The T-twenty he mentioned is a Torx size, which is that six-pointed star shape. Torx is actually much better than Phillips because it is designed specifically to prevent cam-out. It can handle much higher torque without slipping because the sidewalls of the drive are vertical.
So if someone is looking for that "professional grade" set Daniel asked about, where should they start? Everyone knows I-Fix-It, but are they truly the top tier, or is there something even better?
I-Fix-It is excellent, especially for the price and the sheer variety of bits you get. Their Pro Tech Toolkit is basically the industry standard for hobbyists and many professional repair techs. They use S-two steel, and their bit driver has a great feel with a ball-bearing swivel cap. But if you want to go one step further into the "buy it for life" category—the kind of tools that professional German engineers use—you start looking at brands like Wiha, Wera, and PB Swiss.
I have seen the Wera sets. They have those very distinct, ergonomic handles that look almost like a piece of modern art. They are yellow and green or black and green, right?
Those are the ones! The Kraftform Micro handles. They are designed with different zones. There is a fast-turning zone at the top for when the screw is loose and you just want to spin it quickly. Then there is a power zone in the middle for applying torque, and a precision zone right near the blade for fine adjustments. It sounds like marketing speak, but when you are trying to loosen a tiny screw in a cramped space, having that specific grip geometry really matters. It prevents your fingers from cramping up and gives you much better control over the downward pressure.
And what about Wiha? I feel like I see their name mentioned in every high-end tool forum.
Wiha is often considered the gold standard for precision. Their PicoFinish line is incredible. The handles are a bit slimmer than Wera's, which some people prefer for very delicate work where you need to feel every tiny vibration. Their steel is legendary for its durability. If you buy a Wiha set, you are probably still going to be using it twenty years from now. For Daniel's needs, specifically working on desktops, I would actually recommend looking at a set that includes some longer blades.
That leads perfectly into his question about confined spaces. A standard precision screwdriver is usually only a few inches long. If you are trying to reach a mounting screw behind a massive C-P-U air cooler or down near the power supply shroud, your hand is going to be in the way. You can't even see what you're doing.
This is where bit extenders and flexible shafts come in, but you have to be careful. The I-Fix-It set comes with a flexible extension, which is okay for light work, but for a desktop, I prefer a rigid long-reach driver. You can get Wiha drivers with six-inch or even eight-inch shafts. If you are working in a deep case, that extra length is a lifesaver because it keeps your hand and the handle outside of the "danger zone" of the components. You have a clear line of sight to the screw.
Daniel also asked about a "switch" for magnetization. He mentioned that sometimes you want the screw to stay on the tip, but other times you need it to release easily so it doesn't get pulled toward a nearby magnet or component. I do not know if I have ever seen a screwdriver with a physical toggle switch for magnetism. Is that a thing?
Not in the way he is imagining, like an electromagnet with a button. That would be cool, but it would be bulky and require a battery. What we use instead is a magnetizer-demagnetizer block. It is a little plastic cube with two openings. You slide the screwdriver blade through one opening to magnetize it, and you rub it against the steps of the other opening to demagnetize it.
How does that actually work? It feels like magic every time I do it. I remember doing it in middle school science class and being blown away.
It is all about the alignment of magnetic domains within the steel of the screwdriver. When you pass it through the strong permanent magnet in the magnetizer, it aligns those domains in one direction, turning the blade into a temporary magnet. The demagnetizer uses a specific magnetic field geometry to scramble those domains back into a random orientation. It takes about two seconds to do. So while it is not a "switch" on the handle, it is a very quick manual process. Most professional sets will actually come with one of these blocks.
That is definitely a must-have. I can’t tell you how many times I have dropped a screw into the bottom of a power supply or under a motherboard. Without a magnetized tip, getting those back out is a nightmare. But, as Daniel noted, you have to be careful. You do not necessarily want a strong magnet right next to certain components.
Exactly. While most modern computer components are fairly resilient to small magnets, you still want to be cautious around things like traditional spinning hard drives or certain sensitive Hall-effect sensors. Being able to demagnetize the tool instantly is a huge advantage. It gives you total control over the environment.
Let us talk about the electrostatic discharge safety. Daniel specifically asked for an E-S-D-safe set and a mat. I think a lot of people skip the mat because they think as long as they touch the metal case of the computer every few minutes, they are fine. Is that true, or is that just an urban legend?
It is a "better than nothing" approach, but it is definitely not professional grade. Static electricity is a silent killer for electronics. You can fry a component with a discharge that you cannot even feel. A human can generally only feel a static shock if it is over three thousand volts. But a C-M-O-S chip can be damaged or degraded by as little as thirty volts.
Thirty volts? That is nothing. That is like a fraction of a battery.
Right! So you might be zapping your motherboard every time you touch it and never even know why the computer starts acting flaky three months later. You think it's a software bug, but it's actually physical damage from a static event. An E-S-D-safe screwdriver has a handle made of dissipative material. It is designed to bleed off any static charge at a controlled rate so it doesn’t jump all at once in a spark.
And the mat? How does that fit into the system?
The mat is the foundation of a safe workspace. A good E-S-D mat is usually two layers. The top layer is dissipative, and the bottom layer is conductive. You connect the mat to a known ground, like the center screw of a wall outlet or the grounding pin of a plug using a special adapter. Then, you wear a wrist strap that is also connected to the mat. This ensures that you, the tool, the mat, and the computer are all at the same electrical potential. No potential difference means no sparks, no zaps, and no dead motherboards.
For someone like Daniel, who is doing this at home, what should he look for in a mat? I see those cheap blue folding ones online all the time for ten dollars.
Avoid the cheap P-V-C folding ones if you can. They tend to curl up at the edges, they smell like chemicals, and they do not always have great dissipative properties over time. Look for a real rubber mat. They are heat-resistant, so if you ever decide to do some soldering, you won't melt your workspace. Brands like Bertech or Hakko make excellent professional mats. They are a bit of an investment—maybe fifty to eighty dollars—but again, they last forever and they actually work.
One thing Daniel mentioned that I found interesting was the idea of working at weird angles. He mentioned getting a screw to release from a socket without having to take out all the R-A-M sticks. A straight screwdriver can't do that because the handle hits the other components.
That is where the "bit ratchet" comes in. This is one of my favorite tools for desktop repair. It is a tiny, low-profile ratchet that holds standard four-millimeter or quarter-inch bits. Wera makes a beautiful one called the Zyklop Mini. It is only about three inches long and very thin. You can fit it into gaps where a screwdriver handle simply won't go. You can use your thumb to spin the dial for quick movements and then use the ratchet handle for torque.
I have used those. They are amazing for getting at those motherboard mounting screws that are tucked way up in the top left corner of the case, right under the big V-R-M heat sinks.
Exactly. If you combine a bit ratchet with a set of high-quality bits, you are prepared for almost anything. And for those really weird lateral angles, you can even get "offset" screwdrivers, which are shaped like an L, but those are less common in precision sizes. The ratchet is usually the better bet for a P-C builder.
So, if we were to build Daniel a "dream kit" based on his prompt, what is on the list? Let's get specific.
Okay, let's break it down. First, for the main drivers, I would go with a Wiha PicoFinish E-S-D set. Specifically, he should look for the set with the yellow and black handles—that yellow signifies it is E-S-D safe. He should get a set that covers Phillips zero-zero, zero, and one, plus Torx sizes from T-five up to T-twenty. That will cover ninety-nine percent of what he finds in a desktop or a laptop.
And what about those M-two and M-three sizes he was worried about?
Since those are usually Phillips heads, the Phillips zero and one from that Wiha set will cover them perfectly. But, for a desktop, I would also add a couple of "nut drivers" in metric sizes—specifically four-millimeter and five-millimeter. Sometimes motherboard standoffs or hex-head screws are used, and a nut driver is much more secure than trying to use pliers.
Second item on the list?
The Wera Zyklop Mini bit ratchet. It is a game-changer for tight spaces. I would pair that with a good set of precision bits, maybe from I-Fix-It or Wiha. Having both a dedicated driver and a ratchet gives you the best of both worlds.
Third?
A high-quality rubber E-S-D mat, at least twenty-four by thirty-six inches so he has plenty of room to spread out. And don't forget the grounding cord and the wrist strap. That is the most important part. If you aren't grounded to the mat, the mat isn't doing its job.
And fourth?
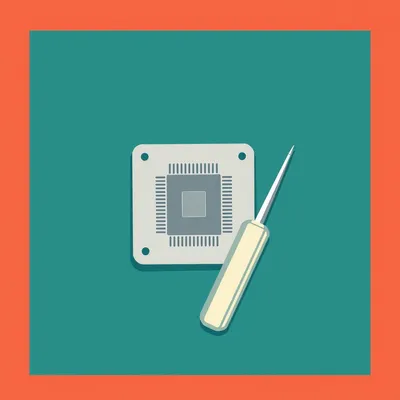
A standalone magnetizer-demagnetizer block. Wiha makes a great one, but even the generic ones work fine for this. And I'd throw in a pair of E-S-D-safe tweezers. When you are working in those confined spaces, sometimes you can get the screw loose, but you can't get your fingers in there to pick it up. A pair of long, curved E-S-D tweezers is the perfect companion.
That sounds like a solid professional setup. It is definitely a step up from the "budget" sets he mentioned. You know, I was thinking about what he said about the Leatherman his wife gave him. He said it was the most enjoyable screwdriver he had ever used. Why do you think that is?
Leatherman tools are surprisingly good for what they are. They use a proprietary flat bit system which is very strong, and the reach is decent. But the real reason he probably liked it is the "heft." A lot of cheap precision tools feel like toys because they are so light and hollow. A tool with some weight and a solid mechanical click feels more reliable. It gives you confidence. But for delicate electronics, you really want that specialized precision handle. You need the feedback. You want to feel exactly how much resistance that screw is giving you so you don't over-torque it.
That feedback is so important. When you are screwing into plastic or a thin aluminum standoff, it is so easy to strip the threads if you can't feel the tension.
Precisely. That is actually another feature of high-end tools. The handles are designed to give you better tactile feedback. If you are using a cheap, thick plastic handle, it absorbs all those subtle vibrations. With a thin, high-quality precision handle, you can actually feel the "bite" of the threads. It is the difference between driving a sports car and driving a bus.
We have talked a lot about the tools themselves, but I think we should touch on the technique too. Daniel mentioned he's been struggling with damaging screws. Even with the best tools, you can still strip a screw if you don't use them correctly.
That is a great point, Corn. The number one rule is "downward pressure." Most people try to turn the screwdriver with all their strength but only push down lightly. You should actually be putting about seventy percent of your effort into pushing the tool into the screw head and only thirty percent into the rotation. This keeps the bits seated and prevents cam-out.
And the "back-turn" trick! You taught me that years ago and it changed my life.
Oh, yes! If you are starting a screw, especially in a delicate hole like a motherboard standoff, turn it backward—counter-clockwise—until you feel or hear a tiny "click." That is the start of the screw thread dropping into the start of the hole thread. Once you feel that click, then you start turning it forward. This prevents cross-threading, which is the fastest way to ruin a motherboard.
I remember learning that the hard way years ago. It feels so counter-intuitive to turn a screw the "wrong" way first, but it works every time. It's like finding the "key" to the lock.
It is a lifesaver. Another tip for Daniel is to stay organized. When you are taking apart a desktop, you end up with twenty different screws of five different sizes. If you put an M-three screw into an M-two hole, you are going to have a bad time. You'll strip the hole out and the screw will be stuck.
I usually use a magnetic parts tray, but Daniel mentioned he wants to be E-S-D-safe. Are those magnetic trays okay for this?
They are generally fine for the screws themselves, but you don't want the tray sitting on top of your motherboard or right next to your S-S-D. A better solution for a professional workspace is an E-S-D-safe organizer or even just a piece of paper where you draw a diagram of the computer and tape the screws to their corresponding locations.
That is a classic move. I have seen people take a photo of the case, print it out, and then just poke the screws through the paper at the right spots. It's low-tech but it works perfectly.
It is brilliant because it is foolproof. You don't have to remember which screw went where three hours later when you are finally putting it back together. It's all about reducing the cognitive load so you can focus on the delicate work.
So, we have covered the brands—Wiha, Wera, and I-Fix-It. We have covered the materials—S-two steel and dissipative handles. We have covered the E-S-D mats and the magnetization. Is there anything else Daniel should be looking for?
Maybe a small, bright L-E-D flashlight or a headlamp. Computer cases are dark, and even in a well-lit room, shadows from the C-P-U cooler or the G-P-U can make it impossible to see if your screwdriver is actually seated in the screw head. If you can't see the screw head clearly, you are much more likely to slip and damage it.
A headlamp is a total game-changer. It keeps both of your hands free for the tools. I actually prefer it over a flashlight because the light follows your eyes.
Exactly. And one last thing: if he ever encounters a screw that is already partially stripped, he can try the "rubber band trick." You place a wide, flat rubber band between the screwdriver tip and the screw. It fills in the gaps and provides extra grip. It doesn't always work, but it's a great "hail mary" before you break out the power tools.
This has been a great deep dive. I think it is easy to dismiss tools as just "stuff," but when you are doing precision work, the tool is the interface between your brain and the machine. If that interface is sloppy or weak, the work is going to suffer.
Well said, Corn. It is about respect for the craft. If you are going to spend hundreds or thousands of dollars on high-end components, it only makes sense to spend fifty or sixty dollars on the tools you need to install them safely. It's an investment in your own peace of mind.
Exactly. And Daniel, if you are listening, definitely go for the Wiha PicoFinish E-S-D set. It sounds like exactly what you need for that professional feel you are looking for. It's a joy to use.
And get the mat! Do not skip the mat. Your motherboard will thank you, and you'll sleep better knowing you didn't accidentally zap your hardware.
Well, I think that covers it for this one. If you have been enjoying the show, we would really appreciate a quick review on your podcast app. It genuinely helps other people find us and keeps the show growing. We've been doing this for a while now, and the community support is what keeps us going.
It really does. We love seeing the feedback and hearing about the projects you all are working on.
You can find us on Spotify, Apple Podcasts, and pretty much everywhere else you listen to podcasts. Our website is myweirdprompts dot com, where you can find our full archive of over six hundred episodes and a contact form if you want to get in touch with your own questions.
And you can always reach us directly at show at myweirdprompts dot com. We read every email.
Thanks for listening to My Weird Prompts. We will be back soon with more of your questions and ideas.
Until next time!
Goodbye everyone.

")