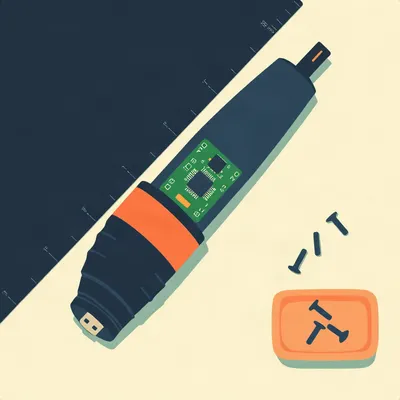
Daniel's been staring at some discolored drill bits and wondering if the rotary tool he bought for engraving can earn its keep on sharpening, polishing, and cleaning duty. He wants specifics, not the usual "it does everything" brochure talk. Which accessories actually work, which ones are a waste of time, and whether a Dremel can put a real edge on a utility knife.

The short answer on the utility knife is yes, but you have to understand what kind of edge you're making. A rotary tool puts a convex edge on a blade, not a flat bevel like you'd get from a whetstone. For a utility knife that's fine, even good. For a chisel or a plane iron it's a disaster.
So the geometry matters more than the tool's ability to remove metal.
Entirely. A utility knife blade is a consumable. People replace them, they don't sharpen them. But if you're going to sharpen one, a small grinding stone spinning at high speed will do it in seconds. The catch is heat. You're generating friction at a single point of contact, and thin blade stock heats up fast. If the edge turns blue, you've drawn the temper and ruined the steel.
So the technique is a light pass, not a grind.
Light pass, keep it moving, dip in water between passes. The Dremel sharpening kit, the A679, comes with three aluminum oxide grinding stones, the 453, 454, and 455. Different diameters and shapes. The 455 is a chain saw sharpening stone, the 453 is a general purpose grinding stone. The kit also has a guide that holds the tool at a fixed angle.
That guide is doing the real work, isn't it. Nobody's hand is steady enough to hold a spinning stone at a consistent angle freehand.
Right, and that's where most people fail with rotary sharpening. They freehand it, the angle wanders, and they end up with a rounded, wobbly edge that's worse than what they started with. The guide clamps onto the tool body and gives you a reference surface. You rest the guide on the blade and the geometry stays consistent.
Daniel's drill bits. That's the discoloration he mentioned. Is that rust, or is it heat discoloration from previous use?
Could be either. If they're old high-speed steel bits that sat in a damp drawer, it's surface rust. If the tips have gone blue or straw-colored, someone overheated them drilling. Rust you can clean. Heat damage means the temper is gone and no amount of sharpening will fix that.
So step one is diagnosis, not grinding.
Step one is always diagnosis. But let's say it's surface rust and a dull cutting edge. A rotary tool with a small grinding stone can touch up a drill bit's cutting lips. The problem is that drill bit geometry is more complicated than a knife edge. You've got two cutting lips that have to be symmetrical, a chisel edge at the center, and a relief angle behind each lip. If you grind one lip longer than the other, the bit walks and drills oversized holes.
How do you even see that at that scale?
You don't, not by eye. Professional bit sharpeners use a drill point gauge or a dedicated grinder with a jig. The Dremel can do it in a pinch, but you're essentially freehanding a precision job. For a large bit, say a half inch, you can see what you're doing. For a small bit, under an eighth of an inch, you're guessing.
So the honest answer is that a rotary tool can sharpen a drill bit, but it's not the right tool for that job.
It's the tool you use when it's the only one you have and the bit is already ruined. If you've got a box of dull bits and a Dremel, you can bring some of them back. If you're trying to do precision work, buy a dedicated drill sharpener or learn to use a bench grinder with a proper rest.
What about the cleaning side of this. Daniel mentioned micro brushes.
That's where the rotary tool shines. The little wire brushes, the nylon bristle brushes, the abrasive buffs. For cleaning corrosion off electrical contacts, getting rust out of small recesses, removing old gasket material from a sealing surface, that's work where the small size is an advantage, not a compromise.
And the speed matters there too, doesn't it. You can run a wire brush at low speed and it's more controlled than a full-size drill.
A full-size drill with a wire wheel is a lot of torque and a lot of momentum. On a small part you're fighting it. The Dremel at ten or fifteen thousand RPM with a small brass brush is delicate enough that you can see what you're cleaning as you clean it.
What's the risk there. Brass bristles flying off?
That's one. Wire brushes shed bristles, and at high speed they become little needles. Eye protection is not optional. The other risk is the brush itself being too aggressive. Brass is softer than steel, so a brass brush won't scratch a steel surface, but it will scratch aluminum if you lean on it. And a steel wire brush will scratch almost anything.
So brass for most cleaning, steel for when you need to remove actual material.
Steel for rust removal on iron and steel parts where you don't care about the surface finish. Brass for electrical contacts and softer metals. Nylon for anything delicate, or for applying polishing compound.
Let's talk about polishing, because that's the third thing Daniel asked about and it's the one where I think people have the most wrong ideas.
What do you mean?
People think a polishing wheel is a polishing wheel. They don't realize the compound is doing the work, not the wheel.
The felt wheel or the cloth wheel is just a carrier. The abrasive is in the compound. You've got your tripoli compound for cutting, your rouge for final polish, your white diamond for aluminum. The wheel picks up the compound and the heat from friction melts it just enough to transfer to the workpiece.
And if you use the wrong compound or no compound at all, you're just burnishing.
Or you're just smearing metal around. The classic mistake is putting a felt wheel on a Dremel, cranking it to full speed, and pressing it against a piece of brass. No compound. What you get is a shiny smear and a ruined wheel. The felt loads up with metal and becomes a cutting tool you didn't intend.
So the sequence is compound first, then contact.
Charge the wheel, touch it to the work, let the speed and the compound do the cutting. Keep the wheel moving. Don't dwell in one spot. And clean the wheel when it loads up. You can dress a felt wheel with a wire brush or a dressing stone.
What about the little rubber polishing points. The ones that look like pencil erasers.
Those are abrasive-impregnated rubber. They come in different grits and they're excellent for mold and die work, for cleaning up small tool marks, for finishing inside a recess where a wheel won't fit. They're less about shine and more about surface refinement. You can take a surface from rough to satin with the coarse ones and up to a near-polish with the fine ones.
Are those the ones that leave the little rubber crumbs everywhere?
They wear down as you use them, and the debris is a mix of rubber and the abrasive. It's messy but it's not toxic. Just don't breathe the dust. Same as any grinding operation.
Daniel's got a specific use case with those drill bits. He wants to clean them up. What's the best sequence for that? Rust removal first, then sharpen, then polish?
Clean first, always. Get the rust off so you can see what you're working with. A brass wire brush at low speed will take off surface rust without removing good steel. Then inspect. If the cutting lips are chipped or the point is rounded over, that's when you decide whether to sharpen or replace. If you're going to sharpen, do that before any polishing. Polishing is the last step, and honestly for a drill bit it's cosmetic.
A shiny drill bit doesn't drill any better.
It doesn't. But there's a case for it. A polished flute evacuates chips better. The chips slide off instead of sticking. On a drill bit that's going to see use in wood or plastic, a quick polish of the flutes can actually reduce binding.
That's a knock-on effect I wouldn't have guessed.
It's the same principle as polishing a rake face on a plane iron or a chisel. The smoother the surface, the less friction, the less heat, the cleaner the cut. For a drill bit it's marginal, but it's real.
So we've got sharpening, which is possible but limited. Cleaning, which is where the tool excels. Polishing, which is all about the compound and the technique. What else is in that accessories kit Daniel's been exploring?
The sanding drums. Those little rubber cylinders with the sanding bands that slip over them. Those are for shaping and smoothing wood, fiberglass, soft metals. They're aggressive. If you're cleaning up a rough edge on a piece of sheet metal or knocking down a weld, the sanding drum is the tool.
And the micro sanders he mentioned. Are those the same thing?
Different. The micro sanders are the small discs or the flap wheels. The flap wheels are layers of abrasive cloth arranged radially, and they're brilliant for getting into contours. They conform to the surface in a way a rigid drum won't.
So if you're polishing a curved piece of metal, the flap wheel follows the curve.
It does, and it wears evenly. The abrasive flaps break off as they dull, so you're always cutting with fresh abrasive. A sanding drum just gets dull and starts burning.
What's the lifespan on one of those flap wheels? Are we talking minutes or hours?
For a small one, maybe fifteen or twenty minutes of actual contact time. It depends on the material and the pressure. But they're cheap, and when they're done they're done. You don't dress them, you replace them.
Let me ask about speed, because I think this is where a lot of people get into trouble. The Dremel spins fast. Really fast. What's the right speed for these different jobs?
The general rule is that speed is for cutting and grinding, and lower speed is for anything where you want control. Polishing with a felt wheel, you want maybe five to ten thousand RPM. Too fast and the compound flies off and the wheel burns. Wire brushing, similar range. Grinding with a stone, you can go higher because the stone is rigid and you want the cutting speed. Sanding, somewhere in the middle.
And the tool itself. Does it have variable speed?
The newer ones do. The basic models have a dial that goes from five thousand to about thirty-five thousand RPM. The older single-speed models just go full blast. If Daniel's got a variable speed model, he should be using the low end for almost everything we've discussed.
Full speed is for cutting wheels and routing bits.
And even then, full speed on a cutting wheel is how you shatter them. The thin abrasive discs are rated for a maximum speed, and the Dremel can exceed that if you're not careful. When they shatter, the pieces go somewhere.
That's the part where you tell people to wear glasses.
I'm going to say it once and then move on. Eye protection. Every time. The wire bristles, the shattered discs, the metal dust. Your eyes are not replaceable.
Noted. So what about the cleaning applications that aren't rust. Daniel mentioned micro brushes. What are the actual brush accessories he's likely to have?
The standard kit usually has a brass wire brush, a steel wire brush, and a nylon bristle brush. The brass one is cup-shaped or wheel-shaped. The nylon one is for gentle scrubbing. Then there are the abrasive buffs, which are the little cylindrical felt or rubber points with abrasive embedded. Those are for polishing small areas.
And the polishing compound. Does that come in the kit?
Usually there's a small amount of red rouge compound included. It's the classic jeweler's rouge, iron oxide. Good for final polish on steel and brass. For aluminum you want something different, a white compound.
So Daniel could clean up those drill bits with the brass brush, touch up the edges with a grinding stone if they're dull, and give them a quick polish with the felt wheel and rouge. That's the full workflow.
And the whole thing would take maybe ten minutes per bit if he's being careful. The point is that the tool is capable of all of it, but the quality of the result depends on patience and the right accessory for the step.
What about sharpening things other than knives and drill bits. Scissors, for instance.
Scissors are hard because the bevel is on one side and the angle is critical. A rotary tool can touch up scissors, but you're better off with a dedicated scissor sharpener or a stone. The Dremel will remove metal fast, and if you take off too much from the wrong side, the scissors won't cut.
So it's a tool for rescuing abused edges, not for maintaining good ones.
If you've got a knife that's already dull, a Dremel will make it cut again. If you've got a knife that's just starting to lose its edge, a stone or a honing rod is the right tool. The Dremel is the emergency room, not the gym.
What about ax heads, lawn mower blades, garden tools. The things people actually abuse.
Lawn mower blades are a good use case, actually. They get nicked and dull, and the Dremel with a grinding stone can clean up the nicks. The problem is balance. If you take more metal off one side than the other, the blade vibrates and destroys the mower's bearings. You need to check the balance after sharpening.
How do you check the balance of a lawn mower blade at home?
Nail in the wall, hang the blade by its center hole. If one side dips, that side is heavier. Grind a little more off the heavy side until it hangs level.
That's a neat trick.
It's the same trick you use for checking a propeller. Balance matters when things spin.
So the rotary tool is a sharpening tool for people who understand geometry and are willing to check their work.
And for people who know when to stop. The biggest mistake with any power sharpening is overdoing it. You take off too much metal, you overheat the edge, you ruin the temper. A light touch and frequent checks.
What about the polishing side for things that aren't tools. Jewelry, for instance.
Jewelry is where the Dremel shines, literally. The felt wheels, the rouge, the small size. You can polish a ring or a bracelet without taking it to a jeweler. The trick is to use the right compound for the metal. Rouge for gold and silver, white diamond for platinum, tripoli for initial cutting on scratched pieces.
So if someone's got a scratched wedding ring, the Dremel is actually the right tool.
It is, with the caveat that you're removing metal. Every time you polish a ring, you take off a tiny amount of the surface. For a ring with deep engraving, you're wearing down the engraving. For a ring with a stone, you have to be careful not to hit the stone.
What about cleaning jewelry. The brushes.
A soft brass brush with a little soap and water will clean the gunk out of a ring's setting. The nylon brush is even gentler. That's a job where the Dremel's small size lets you get into places a toothbrush can't reach.
So cleaning is the safest entry point. Polishing is the middle ground. Sharpening is the advanced skill.
That's a reasonable hierarchy. Start with cleaning, get a feel for the tool, then move to polishing, and only try sharpening when you understand how the tool removes metal.
Daniel's already got the engraving experience, so he's past the beginner stage. He knows how the tool handles.
Then he's probably ready for all three. The drill bit project is a good test. Clean them first, see how they look. If they're just dirty, he's done. If they're dull, he can try touching up the edges. Worst case, he ruins a bit that was already useless.
That's the thing about practicing on ruined tools. You can't make them worse.
You can make them worse in the sense that you could turn a dull bit into a broken bit, but if it was going in the bin anyway, there's no loss.
Let's talk about the micro brushes more specifically. Daniel said he's been exploring them. What are the actual shapes and what's each one for?
You've got the cup brush, which is good for flat surfaces. The wheel brush, which gets into corners and slots. The end brush, which is like a tiny bottle brush for holes and recesses. Then the nylon versions of all three. The nylon cup brush is great for cleaning battery terminals without scratching the lead.
Battery terminals. That's a car maintenance job.
Disconnect the battery, clean the posts and the cable clamps with a brass or nylon brush, reconnect. Better contact, less corrosion. The Dremel is perfect for it because the posts are small and the brush fits around them.
So it's not just workshop tools. It's car maintenance, jewelry, even household stuff.
The people who use a Dremel for everything are the ones who understand that it's a small, precise, high-speed motor with interchangeable tips. Once you see it that way, the applications are endless.
What's the one accessory Daniel should buy that probably didn't come in his kit?
The flexible shaft attachment. It moves the spinning bit to a handpiece that's about the size of a pen. For detail work, for getting into tight spaces, for anything where the tool body is too bulky, the flexible shaft is transformative.
So you're holding a pen instead of a drill.
You're holding a pen that spins at twenty thousand RPM. Your control goes up dramatically because you're gripping it like a writing instrument. For polishing small parts, for cleaning inside a mechanism, for any kind of fine work, it's the single best upgrade.
Does it work with all the same accessories?
Same collet system, same bits. It's just a flexible drive cable in a sheath. You attach it to the tool in place of the collet nut, and the handpiece has its own collet.
What's the downside?
You lose a little bit of torque through the cable, and the cable needs to be hung up so it doesn't kink. But for the kind of work Daniel's describing, the precision gain far outweighs the torque loss.
So the workflow for those drill bits might be: brass brush on the flexible shaft to clean the rust, grinding stone on the flexible shaft to touch up the edges, felt wheel with rouge to polish. All with the same tool, three different accessories.
And the flexible shaft the whole time, so he's working with a pen instead of a drill. That's the setup.
What about the speed for each of those steps on the flexible shaft?
Same as on the tool body. Low for cleaning and polishing, medium for grinding. The flexible shaft doesn't change the physics, just the ergonomics.
You mentioned the collet system. Is there anything Daniel needs to know about changing accessories?
The collet nut has to be tight, and you use the little wrench that comes with the tool. There's a button on the tool body that locks the shaft so you can tighten against it. If the bit slips in the collet, it'll score the shaft and then nothing will hold properly.
So it's a maintenance thing. Keep the collet clean, tighten it properly.
And don't overtighten. The collet is a precision part. If you strip the threads, you're buying a new one. Snug is enough.
I want to go back to something you said earlier about heat and tempering. How fast does a Dremel actually overheat a blade edge?
At full speed with a grinding stone, you can draw the temper in a second or two. The edge is thin, the heat has nowhere to go, and the temperature spikes. That's why you dip in water constantly. The water isn't just cooling the blade, it's preventing the temperature from ever reaching the point where the steel's structure changes.
So the water is doing the same job as the quench in the original heat treatment.
It's preventing an unwanted quench, actually. When you overheat the edge and then it cools quickly, you're re-hardening it without tempering. That leaves it brittle. The water keeps it below the critical temperature so the original temper is preserved.
That's a subtlety most people don't get. They think the water is just to stop the blade getting hot to the touch.
It's doing both. But the metallurgical reason is the important one. You're protecting the heat treatment that the manufacturer already did.
So for Daniel's utility knife, the technique would be light passes with a grinding stone, water dip between passes, and the guide to hold the angle.
And a final hone with a fine stone or a ceramic rod to knock off the burr. The Dremel leaves a burr, just like any grinder. You need to remove it for the edge to feel sharp.
What's a burr, for the listener who's never sharpened anything.
It's a microscopic lip of metal that forms on the edge as you grind. It folds over to the opposite side. When you feel a sharp edge with your thumb, part of what you're feeling is the burr. A proper sharpening removes the burr and leaves a clean intersection of two surfaces.
So sharpness isn't just about the angle, it's about the cleanliness of the edge.
A clean edge at a slightly obtuse angle will cut better than a burred edge at a perfect angle. The burr folds over and acts like a dull edge.
That's why the honing step matters.
That's why a dull knife can be brought back with just a honing rod. You're not removing material, you're re-aligning the edge and knocking off the micro-burr. The Dremel is for when the edge is actually gone.
So we've got a full picture now. Cleaning is straightforward and safe. Polishing is about compound and technique. Sharpening is possible but demands understanding of geometry and heat.
And the accessories map cleanly onto those jobs. Wire brushes for cleaning, felt wheels and compound for polishing, grinding stones for sharpening. The sanding drums and flap wheels are for shaping and surface prep, which is a fourth category Daniel didn't ask about but probably has in his kit.
What would he use those for in a practical sense?
Removing rust from a flat surface before repainting. Smoothing a rough edge on a cut piece of metal. Taking the burr off a drilled hole. Shaping a wooden handle to fit a hand. The sanding drum is the workhorse for anything where you need to remove material over an area, not just at a point.
The flap wheels are for contours.
For finishing. A flap wheel with a fine grit leaves a surface that's almost polished. It's the bridge between sanding and polishing.
The kit Daniel got with his Dremel is actually a pretty complete system.
It is, and that's the thing about Dremel kits. They give you a little bit of everything, and most people use one or two accessories and ignore the rest. The value is in learning what each one does and when to reach for it.
That's the whole point of Daniel's question, really. He's got this tool, he's been using it for one thing, and he's realizing it can do more. He just needs the map.
The map is: match the accessory to the material, match the speed to the job, and respect the heat.
I think that's a good summary. But let me push on one thing. You said the Dremel is the emergency room, not the gym, for sharpening. Does that mean Daniel shouldn't bother trying to sharpen his drill bits?
He should try, because the bits are already dull and he's not going to make them worse. But he should go into it knowing that a hand-sharpened drill bit from a Dremel is never going to be as good as a factory grind. The geometry is too complex to nail freehand.
It's a rescue operation, not a precision service.
It's the difference between a bit that drills a slightly rough hole and a bit that doesn't drill at all. For most home use, the slightly rough hole is fine.
What about the polishing compounds. Is there a specific brand or type Daniel should look for?
The Dremel-branded compounds are fine for starting out. They come in small tubes and they're matched to the Dremel wheels. If he gets serious, there are better compounds from the jewelry supply world, but for drill bits and utility knives, the basic rouge is plenty.
The felt wheels. Do they wear out?
They load up and they lose their shape. You can dress them with a wire brush to clean them, and you can reshape them with a dressing stone. Eventually they get too small or too misshapen and you replace them. They're consumables.
The ongoing cost of the Dremel is in the accessories, not the tool.
That's the business model, and it's a fair one. The tool lasts for years. The bits and wheels are meant to be used up.
I think we've covered the three applications Daniel asked about. Let me ask you one more thing. What's the most common mistake you see people make with the polishing side?
Using too much compound. A little goes a long way. If you load the wheel with too much, it just flings off and makes a mess. You want a thin, even coating. Charge the wheel, touch it to the work, and let the friction do the rest.
The most common mistake with cleaning?
Using a steel brush on something soft. Steel on brass, steel on aluminum, steel on copper. It scratches. Match the brush to the metal.
The whole episode comes down to matching. Matching the accessory to the material, the speed to the job, the technique to the geometry.
Knowing when the rotary tool is the right tool and when it's the wrong tool. It's not a universal machine. It's a small, fast, precise machine, and that's a specific set of strengths.
I think Daniel's drill bits are going to be fine. Clean them up, touch up the edges, maybe polish the flutes. Worst case, they were already dull.
Worst case, he learns something about drill bit geometry and heat treatment. That's not a bad outcome either.
The discolored bits are actually a training opportunity.
They're a low-stakes way to learn the sharpening skills. If he ruins them, he was going to replace them anyway. If he succeeds, he's got working bits and new skills.

The 455 stone. It's not for chainsaws.
What?
The 455. Dremel lists it as a chainsaw sharpening stone, but it's just a cylindrical aluminum oxide stone, three thirty-seconds of an inch diameter. I used the same stone for sharpening fishhooks when I worked at a tackle shop in the eighties. You don't need the Dremel guide for a fishhook. You just touch the point.
That's actually a good point. The stone doesn't know what it's sharpening. The shape is the shape.
The guide is the part that makes it a chainsaw sharpener. Without the guide, it's just a small round stone. We sold them loose for a dollar twenty-five. People used them for all kinds of things.
The accessory numbering is about marketing, not capability.
The 453 is the same stone in a different diameter. The 454 is a pointed one. They're all just aluminum oxide on a shank. What you do with them is up to you.
That's true of most of the Dremel accessories. The names are suggestions. The geometry is what matters.
I sharpened a lot of hooks with a 455. Never once sharpened a chainsaw.
Did you use water to keep the hooks cool?
Fishhooks are small enough that they don't get hot. A second of contact, maybe two. You're just putting a point back on. The barb does the holding, the point does the penetrating.
The heat concern is proportional to the mass of the steel. A fishhook doesn't have enough mass to hold heat.
A drill bit does. So does a knife blade. But a fishhook, no. You touch it to the stone and it's done.
That's a useful distinction. The heat problem scales with the size of the workpiece.
With how long you hold it there. People hold the stone on the metal too long. That's the whole problem.
Light passes, keep it moving, dip in water. Same advice for everything.
I never used water on a fishhook. Just the stone, a light touch, and a steady hand. You can feel when the point is right.
The Dremel is a fishhook sharpener too.
It's a small spinning stone. It sharpens anything small enough to hold against it. The rest is just names on a package.
That's the thing about the whole episode, really. Daniel asked about three applications, but the underlying principle is the same. A small, fast, precise motor with interchangeable tips. The tips don't care what they're called.
The marketing names are for people who don't want to think about the geometry.
The geometry is the whole game.
The geometry and the speed. Those two things. Everything else is packaging.
For Daniel's drill bits, the answer is yes, with caveats. For the utility knife, yes, with a guide and water. For cleaning, yes, with the right brush. For polishing, yes, with compound and patience.
For anything else, the question is just: what shape is the bit, what speed is right, and what material am I touching it to.
That's a good place to land. Daniel's got the tool, he's got the accessories, and now he's got the framework.
If he ruins a drill bit, it was already dull. No loss.
I think that's the episode. Thanks to Hilbert for the fishhook correction.
For the reminder that the accessory names are just suggestions.
This has been My Weird Prompts. If you want to send us your own questions about tools, materials, or anything else, email us at show at my weird prompts dot com.
We'll be back soon.