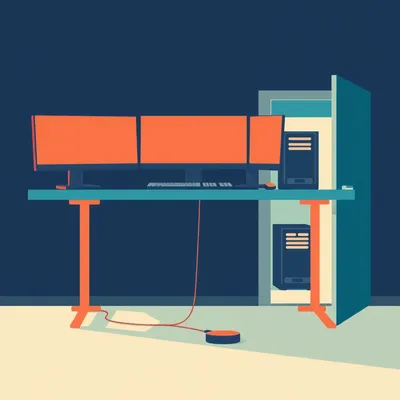
Daniel sent us this one — well, actually his wife sent it, which is a first for the show. She's building a custom storage unit for their living room, and Daniel's home network lives right there where the fiber comes in. Server, switch, modem, UPS, PDU, NAS — the whole stack. And their son Ezra is one year old and grabby, so everything needs to be enclosed. Daniel's previous solution was a cheap IKEA cabinet that's not going to work in the new modular design. He already has a small six U communications closet enclosure, and the question is: how do you integrate a proper rack mounting system into custom living room furniture — what rails to buy, what the spacing standards are, and how to make it all look like a normal piece of storage instead of a data center that wandered into the wrong room.

This is exactly the kind of problem that sounds niche until you realize how many people are hitting it right now. Fiber to the home is becoming standard, more families are running actual home labs, and suddenly you've got a toddler who treats blinking lights like a treasure hunt. The tension between child safety, network reliability, and furniture that doesn't make your living room look like an IT closet is a genuine design challenge. It's woodworking meets telecom standards.
The IKEA hack failed. I feel like that's the starting gun for half the projects we talk about on this show. Someone buys a Besta or a Lack, thinks it'll do the job, and six months later the particleboard is sagging and the door doesn't close because the cables are spilling out.
The IKEA hack is the gateway drug to actually building something properly. And in this case, Daniel already has the enclosure — a six U communications closet — so the question isn't "what box should I buy." It's "how do I embed a rack standard into furniture I'm building myself." That's a different problem, and it's one where knowing the actual dimensions and hardware names matters, because you're cutting wood to fit metal.
Let's start with the obvious question. What is a six U rack, and why is that the right size here?
U stands for "rack unit," and one U is exactly one and three quarter inches of vertical height. So a six U enclosure gives you ten and a half inches of usable vertical space. For the gear Daniel has — a modem, a four-port switch, a NAS, a UPS, a PDU — six U is actually generous. Most of those devices are one U or less. The UPS might be two U. You've got room to spare.
When someone says "six U," they're not talking about width. They're talking about how many slots of one point seven five inches they can stack.
The width is a separate standard, and it's the one that confuses people building their own cabinets. The nineteen-inch rack standard means exactly nineteen inches between the front mounting flanges. But here's the number that actually matters when you're cutting wood: the horizontal distance between the two mounting rails is eighteen point three one inches. That's nineteen inches minus the thickness of the two rails themselves.
Eighteen point three one. That's the kind of number where if you round it, you're going to have a bad day.
If you build your cabinet interior to exactly nineteen inches, the rails won't fit. If you build it to eighteen inches, the equipment won't fit between them. Eighteen point three one is the number. Write it down.
That's where the IKEA hack falls apart, because you're not building to that tolerance. You're drilling holes in particleboard and hoping.
Which brings us to the first misconception we should knock down. The idea that you can just screw rack rails into any wooden cabinet and call it done. You can't. The rails need to be bolted into a rigid frame — three quarter inch plywood or solid wood. Particleboard will strip out. When you've got a UPS that weighs fifteen or twenty pounds, the last thing you want is the mounting screws tearing out of the side panel at two in the morning.
The sound of a UPS hitting the floor is not the kind of white noise that helps anyone sleep. And it's the kind of failure that could yank every Ethernet cable out of your patch panel on the way down.
The structural material matters. Three quarter inch plywood, minimum. Solid hardwood if you're feeling fancy. But not MDF, not particleboard, not the stuff IKEA cabinets are made from.
Let's talk about what Daniel's wife actually needs to buy. She mentioned Daniel already has a six U communications closet enclosure. Does that mean the rails are already in it?
It depends on what he bought. Some communications closets come with rails pre-installed. But if she's building custom furniture and wants to embed the rack into the storage unit itself — rather than just sticking the whole enclosure box inside a cabinet — then what she probably wants is a rack rail kit. These are sold separately: just the metal rails with pre-drilled holes, plus the cage nuts and screws you need to mount equipment. They're designed specifically to be mounted into custom enclosures.
Which one should she get?
The Startech six U adjustable rack mount rail kit — part number R K six U. It costs about thirty dollars, comes with cage nuts and screws, and the depth adjusts from ten inches to twenty four inches. That adjustability is key, because it means she can match the rail depth to whatever cabinet depth she ends up building. Penn Elcom and NavePoint make them too. You're buying bent steel with holes in it. There's no reason for it to cost a fortune.
Now, you mentioned cage nuts. I want to pause on that, because if you've never built a rack before, the phrase "cage nuts" sounds like something you'd find in a particularly aggressive pet store.
Cage nuts are little square nuts that clip into the square holes on the rail. The nut sits inside a spring steel cage that snaps into the hole, and then you thread a screw through your equipment's mounting ear and into the nut. The reason they exist is flexibility. If you have threaded holes in the rail itself, you're stuck with whatever thread pitch those holes are tapped for. With cage nuts, you can swap them out if your equipment uses a different screw size. For a home setup where you might swap gear over time, square hole rails with cage nuts are absolutely the way to go.
What thread are we talking about for most home networking gear?
Most consumer and prosumer rack equipment uses ten thirty two or twelve twenty four screws. Ten thirty two is the finer thread and covers probably ninety percent of what Daniel has. The cage nut kits usually come with both.
She buys the rail kit. What does she actually bolt the rails into?
The simplest approach is to have the rack section be its own compartment with three quarter inch plywood sides. The L-bracket style rails have a flange that sits flat against the inside of the cabinet wall, and you run bolts or heavy wood screws through the flange into the plywood. The rails attach to the inside walls of the cabinet compartment — they don't span between two vertical posts the way they would in a freestanding server rack.
That's why the interior width of that compartment needs to be precise.
If she's using three quarter inch plywood for the sides, and the rails need to be eighteen point three one inches apart, then the interior width needs to account for the thickness of the rail flanges. Typically, you want about nineteen and a half inches interior width. That gives you room for the rails to sit on the plywood and still have the correct spacing between the mounting faces.
Nineteen and a half inches interior width. And if you're off by half an inch, your equipment either won't fit or the mounting holes won't line up.
The vertical hole spacing matters too. The mounting holes on the rail are spaced in groups of three per rack unit. The vertical distance between holes within a U is five eighths of an inch — the pattern goes hole, five eighths, hole, five eighths, hole — and then the gap to the next U is also five eighths from the third hole of one U to the first hole of the next. So the holes are evenly spaced at five eighths of an inch all the way up, but grouped so you can visually identify where each U begins and ends.
Which matters when you're mounting equipment, because you want your one U switch to occupy exactly one U of space, not one U plus a bit that makes the next slot unusable. Most equipment has mounting ears with slots rather than single holes, so there's a little vertical play. But you still need to land those ears in the correct U position.
The rail kit handles the mounting. But what about depth? The cabinet depth needs to be at least eighteen inches to accommodate most network gear. A typical switch or modem is maybe ten to twelve inches deep, but you need clearance behind it for cable bends and airflow. If Daniel has a UPS, those can be fourteen to sixteen inches deep. Go eighteen inches minimum, but twenty to twenty four inches is safer. You want enough room that the Ethernet cables aren't crammed against the back wall, because a tight bend radius on a Cat six cable can actually degrade the signal.
The cable itself gets damaged?
Ethernet cables rely on precise twisting of the internal pairs to reject interference. If you bend them too sharply — tighter than about a one inch radius for Cat six — you can untwist the pairs inside the jacket, and your gigabit link might drop to a hundred megabits or start throwing errors. It's one of those invisible problems that drives people crazy because the cable looks fine. So my recommendation is twenty inches minimum interior depth. That gives you room for the gear, the cable bends, and your hands when you need to swap something.
Alright, so we've got the rails, the spacing, the depth. But the whole reason this is a custom furniture project and not just "buy a rack cabinet" is that it needs to look like it belongs in a living room. And it needs to keep Ezra out. Those two constraints pull in opposite directions.
They do, but they can actually work together if you design the cabinet face correctly. The simplest approach is to build the cabinet with a solid wood face frame and a hinged door that matches the rest of the storage unit. The face frame covers the raw edges of the plywood, and the door — if you make it from the same wood with the same finish as everything else in the room — just looks like another cabinet. Behind that door, the rack rails and equipment can be as industrial as they need to be. Nobody sees them when the door is closed.
The door latch? Because a one-year-old will figure out a magnetic push latch faster than you'd think.
For toddler proofing, you want something that requires a deliberate action an adult can do and a one-year-old can't. A magnetic childproof lock — the kind that uses a magnetic key you hold against the outside of the door to release the catch — is ideal. Totally invisible from the outside, no visible lock to ruin the furniture look, and Ezra can't open it until he's old enough to understand magnets, at which point he's also old enough to be told not to.
Because we're talking about a wooden box with a sealed door. That's a thermal trap.
That's the hidden killer. A UPS and a NAS generate real heat. A typical small UPS might dissipate twenty or thirty watts just maintaining its battery. A four-bay NAS can pull fifty watts under load. Add a switch and a modem, and you've got maybe a hundred watts of heat inside a wooden box. Without ventilation, the internal temperature can climb to fifty or sixty degrees Celsius, which will cook your hard drives and shorten the life of everything in there.
You need airflow. But you also need to keep tiny fingers out of the vents.
The standard approach is passive convection: intake vents at the bottom, exhaust vents at the top. But in a toddler-proof cabinet with a sealed door, passive convection might not be enough. I'd recommend a low-noise fan — something like an AC Infinity one hundred twenty millimeter fan mounted in the top panel, blowing out. Those move about seventy five cubic feet per minute at twenty four decibels, which is quieter than a whisper. You can wire it to a thermal switch so it only runs when the cabinet reaches a certain temperature.
The intake vent at the bottom needs a fine mesh screen behind it. Because Ezra will absolutely try to post a cracker through that vent.
Fine mesh — like the stuff used for window screens — mounted behind the vent grille. It keeps objects out without significantly restricting airflow. Paint the mesh black and mount it behind a dark grille, and it's practically invisible.
The black interior is a theme here, isn't it? In well-done network cabinets, the inside is always painted flat black.
It's the cheapest aesthetic trick in the book. Paint the interior flat black, use black rack rails, and when the door is open, the gear looks intentional rather than industrial. When the door is closed, the dark interior means you don't see the equipment through any gaps. The eye reads it as shadow, not technology. It's the same principle as a theater stage — black box, lights on the performers, everything else disappears.
One more thing about the physical layout. Daniel mentioned they want to run Ethernet from this cabinet to another room. That's a cable routing problem on top of everything else.
It's the single most future-proof thing they can do right now. If they're building custom furniture anyway, they should run a conduit from this cabinet to wherever the Ethernet needs to go. One inch PVC pipe or smurf tube — the blue flexible conduit electricians use — run through the wall or under the floor. Once that conduit is in place, pulling new cables later is trivial. You just fish them through. No cutting drywall, no fishing tape, no swearing. It costs maybe twenty dollars in materials and an hour of work during the build, and it saves you a weekend of drywall repair later.
If they ever want to upgrade from Cat six to fiber, or add a second run, or pull HDMI — the conduit handles it.
The conduit is the gift your future self gives you. I cannot overstate how much I recommend this.
The rough plan is: build a compartment with three quarter inch plywood sides, interior width nineteen and a half inches, depth at least twenty inches. Mount a six U rack rail kit inside using the L-brackets bolted through the plywood. Install a fan at the top, mesh-covered intake at the bottom. Paint the interior black. Face frame and hinged door to match the rest of the storage unit, with a magnetic child lock. Conduit to the other room. That's the skeleton.
That's the skeleton. And what I like about this approach is that it doesn't require any specialized metalworking. It's woodworking plus a thirty dollar rail kit. Any competent DIYer can do this in a weekend.
The trick is knowing the numbers. Eighteen point three one inches between rails. Five eighths inch hole spacing. Twenty inches minimum depth. Those are the things that aren't written on the box the rail kit comes in.
They're not, and they're the things that separate a cabinet where the equipment slides in perfectly from one where you're drilling extra holes and shimming things and muttering under your breath.
What's the first thing Daniel's wife should actually buy? If she's sitting there with a sketchpad and a tape measure, what goes in the shopping cart?
The Startech R K six U rack rail kit. Thirty dollars, comes with cage nuts and screws, adjustable depth. That's step one, because once she has the rails in hand, she can measure them directly and confirm the interior width before she cuts any wood. Never trust a spec sheet when you can hold the part in your hands.
Measure twice, cut once, and don't trust the internet to tell you how wide your rails are.
The internet is a good starting point. The actual rail in your actual hands is the truth.
We've laid out the skeleton. But the thing that's going to make or break this project is the stuff that happens after the gear is mounted. The heat, the cables, the toddler who's going to get older and smarter. Let's go deeper on those.
The heat problem is where these projects quietly fail. You build the cabinet, mount the gear, close the door, and three months later your NAS is throwing disk errors and you can't figure out why. The answer is you built an oven. A hundred watts of continuous heat in a sealed wooden box will push the internal temperature past fifty Celsius. Hard drives are rated for maybe forty-five to fifty-five degrees operating. You're running them right at the edge of their spec, twenty-four hours a day. The bearings wear faster, the electronics degrade, and the UPS battery — lead-acid batteries lose half their life for every eight degrees above twenty-five Celsius. You're cooking your backup power without knowing it.
Passive vents at the bottom and top. But with a toddler-proof door that seals, the convection path gets choked.
That's the catch. Passive convection works when there's an unobstructed path from bottom to top. Put a sealed door on the front, and you've blocked the airflow. So for a toddler-proof cabinet, I'd go active. A single one hundred twenty millimeter fan in the top panel, blowing out, wired to a thermal switch. The AC Infinity S one twenty moves about seventy-five cubic feet per minute at twenty-four decibels — quieter than the refrigerator in the next room. A thermal switch — about fifteen dollars — turns the fan on when the temperature hits thirty-five Celsius. Below that, the fan is off. The gear is silent most of the time, and the fan only runs when it actually needs to. That matters in a living room.
What about the noise of the gear itself? A NAS with spinning disks has a hum. A UPS transformer can buzz. In a wooden cabinet, that sound can resonate.
The plywood actually helps here, especially if you line the inside with acoustic foam or even just adhesive felt pads on the panels that aren't vents. It damps the resonance. You don't need to go full recording studio — just breaking up the flat wooden surfaces cuts down the hollow box effect.
The thermal plan is: intake mesh at the bottom, fan at the top on a thermal switch, maybe some felt lining. Now, the cables. Right now we've got at least five power cables and five Ethernet cables. In a dark cabinet, that turns into spaghetti in about a week.
Unlike a data center, you can't just let the spaghetti hang. The door opens into the living room. The solution is a vertical cable management finger duct mounted on one side of the rack, between the rails and the cabinet wall. It's a plastic channel with fingers that the cables snap into, running the full height of the rack. All the patch cables go into the duct, come out exactly where they need to, and the rest is hidden.
The duct is like a cable gutter. Everything runs vertically in one tidy column, then breaks out horizontally only at the port it's plugging into.
For the patch cables themselves, buy pre-terminated cables in exact lengths. Six-inch or one-foot Cat six patch cables for connections within the rack. Don't use the three-foot cables you have lying around and coil up the slack — that's how spaghetti starts. Exact-length cables, snapped into the finger duct, and the whole thing looks intentional.
Where the cables exit the cabinet? Because they've got to get out somehow, and that's another hole Ezra will find.
A brush grommet plate. It's a plastic plate with a slot filled with dense bristles — looks like a giant toothbrush. You mount it in a cutout in the back or bottom of the cabinet, and the cables pass through the bristles. The bristles close around the cables, so there's no open hole for a toddler to reach into, and it looks clean. A two-inch brush grommet costs about eight dollars.
That's where the conduit connects. The cables come out of the brush grommet, into the one-inch PVC or smurf tube, and disappear into the wall.
That conduit is the single smartest thing they can do during the build. Once it's in, pulling new cable takes thirty seconds. No fishing, no drywall repair, no swearing.
Alright, so the gear stays cool, the cables stay tidy, Ezra can't get in. Now the part that actually matters for the living room: making this thing look like furniture. You mentioned painting the interior flat black.
The face frame and door are where the furniture disguise happens. Build a solid wood face frame that matches the rest of the storage unit — same species, same stain, same profile on the edges. The frame covers the raw plywood edges of the cabinet box. Then hang a hinged door on that frame that looks identical to every other cabinet door in the room. When it's closed, it's just another door. Nobody knows there's a network behind it.
The door latch. You said magnetic child lock with a key.
The kind where you hold a magnetic key against the outside of the door to release an internal catch. Totally invisible from the outside — no keyhole, no padlock, no indication that this cabinet is different from any other. Ezra can't open it until he's old enough to understand how magnets work, and by then he's also old enough to be told "don't touch the network gear.
What about the inside? When you do open the door, you're looking at rack rails and blinking lights. That can still read as "server closet" even if the outside is furniture.
Flat black paint on every interior surface, black rack rails, black cable management duct, black brush grommet. When the door is open, the black makes the gear look deliberate — like a high-end media cabinet, not an IT closet. The lights on the switch and NAS become little jewels against the dark background instead of clutter. It's the same reason high-end audio racks are black inside. Black recedes, the lights pop, and the whole thing reads as intentional design.
If they want to go a step further, there's the false front panel. Instead of a door that swings open, you build a panel that looks like a fixed cabinet front but hinges down — like the drop-down front on an old entertainment center. When it's closed, it just looks like a solid panel below the other cabinets. No visible door seam at all.
It's the nuclear option for aesthetic integration. But even the simpler version — a hinged door with a face frame, black interior, black rails — gets you ninety percent of the way there. The key is matching the wood and the finish to the rest of the room. If the other cabinets are white oak with a matte varnish, this door is white oak with a matte varnish. Consistency is the disguise.
Let's boil all of this down into something you can actually act on. If I'm standing in the lumber aisle with my phone in one hand and a tape measure in the other, what do I need to know?
Step one, buy the rail kit before you cut anything. Startech R K six U, thirty dollars, square hole, adjustable depth, comes with cage nuts and screws. Hold it in your hands, measure it yourself, then cut your wood to match. Step two, build the rack compartment to nineteen and a half inches interior width. That accounts for three quarter inch plywood sides and gives you the correct eighteen point three one spacing between the rail faces.
Nineteen and a half wide, twenty inches deep minimum, and about fifteen to sixteen inches tall for the rack compartment itself. Those are the three numbers that go on the sketch.
Step three, ventilation. Top panel gets a one hundred twenty millimeter fan — AC Infinity, seventy five CFM, twenty four decibels — wired to a thermal switch so it only runs when the cabinet hits thirty five Celsius. Bottom panel gets an intake vent with fine metal mesh behind it, painted black. Step four, the door latch. Magnetic child lock with an external key. Invisible from the outside, impenetrable to a one year old. Step five, run that conduit now. One inch PVC or smurf tube from the back of the cabinet to the target room. Twenty dollars, one hour, and it saves you a drywall project later.
The one thing on that list you absolutely cannot compromise on is depth. If you build a shallow cabinet — under eighteen inches — you're going to force tight cable bends that degrade your Ethernet signal, and you're going to choke the airflow. Twenty inches minimum. That's the hill to die on.
It's the thing people cut because they want the cabinet to protrude less into the room, and it's the cut they regret. The cables get crimped, the gear runs hot, and six months later you're rebuilding the cabinet you just built.
The aesthetic move that ties it all together? Paint the inside flat black. Black rails, black duct, black mesh. When the door is closed, the dark interior reads as shadow. When it's open, the gear looks deliberate instead of industrial. A ten dollar can of flat black paint does more heavy lifting for the look of this project than any piece of hardware.
It's the difference between "server in a box" and "media cabinet with a secret.
One last thing. Ezra's one now, and the magnetic lock handles that. But he won't be one forever. At some point he's going to figure out that this cabinet has blinking lights inside, and he's going to want to press every single one of them. What's the long game?
The magnetic lock buys you maybe three years. A four-year-old watches you hold the key against the door, sees it open, and files that away. After that, you need something he can't open even if he knows how it works. A small cam lock on the door, keyed alike with the rest of the house keys, is unobtrusive on a cabinet that already reads as furniture. Or if they want to keep the invisible look, there are RFID locks that open with a fob or a phone. A four-year-old isn't defeating that.
Though at that point you're adding electronics to secure your electronics, which has a certain ouroboros quality to it.
There's a version of this where Ezra is twelve and running his own Minecraft server in that cabinet and you don't need the lock at all. But between one and twelve, a lockable front panel or even a plexiglass window with a key lock gives you peace of mind. The plexiglass option is nice because you can still see the status lights without opening the door.
The other thing that changes as Ezra gets older is the network itself. Six U is generous now, but five years of IoT devices, higher bandwidth, maybe a second switch or a larger NAS — that rack fills up faster than you think.
That's why the conduit is the gift that keeps giving. Right now they're running one Ethernet line. In three years, maybe it's two lines and a fiber run. The conduit means none of those upgrades require touching the furniture or the walls. The rack compartment itself — if they leave an extra two U of empty space now, they've got room for a patch panel or a second switch later. Six U with two U free is a lot more future-proof than six U packed to the gills.
The build isn't just about solving today's problem. It's about building a piece of furniture that absorbs whatever the network becomes over the next decade. The conduit, the extra rack space, the thermal headroom from that fan — those are all bets on the future.
That's really what makes this different from the IKEA hack. The IKEA cabinet solved the problem for about six months. This build solves it for ten years, and it does it while looking like a normal piece of living room storage. That's the win.
Now: Hilbert's daily fun fact.
Hilbert: In nineteen sixty three, astronomers observing transient lunar phenomena from an observatory in Niger reported a ruby-red coloration near the Aristarchus crater, later attributed to outgassing that may have briefly tinted the lunar surface with iron-rich mineral deposits.
I didn't know the moon could blush.
Apparently it does, and apparently someone was watching from Niger in nineteen sixty three. Our producer Hilbert Flumingtop, keeping us humble and slightly confused. This has been My Weird Prompts. If you want to send us your own home networking furniture dilemmas or anything else, email the show at show at my weird prompts dot com. We'll be back next week.

")