Daniel sent us this one from the trenches of renting in Israel — he's got a stack of cheap IR blasters, mostly Broadlink RM4 Minis, and they all have the same infuriating problem. The hardware can clearly learn infrared commands, it's got the receiver photodiode right there, but the learned codes never show up in Home Assistant. The Broadlink integration connects fine, exposes a device endpoint on port eighty, but the codes you actually taught it? Locked behind Broadlink's cloud. He's bought three of these things, is willing to sacrifice two to the cause, and wants to know how to tear them open, dump the firmware, flash something open, and get those IR commands into MQTT where they belong. Bricking is not a concern. So where do we even start with this?

The thing that makes this so maddening is that the hardware is already capable. The Broadlink RM4 Mini has an ESP8266 chipset, an IR receiver photodiode, an IR LED array, and two megabytes of SPI flash. When you teach it a code from your Electra remote, it records the raw timing pulses — we're talking microsecond-precision arrays like nine thousand, forty-five hundred, twelve hundred — and stores them. The Home Assistant integration can see the device, it can send pre-loaded codes from Broadlink's public database, but the codes you personally learned? Those sit in an encrypted section of flash that the local API on port eighty never touches. The only path Broadlink gives you to access your own learned codes is through their cloud API.
The device learns the code, stores it locally, and then tells you — through the app — "yes, I have this code." But when Home Assistant comes knocking on the local API, the device plays dumb. That's not a technical limitation, that's a business decision wearing a technical costume.
And it's not subtle about it either. If you look at the RM4 Mini's board, there are UART pins right there — labeled, unpopulated, but clearly visible on the PCB. They're not hidden. Broadlink just counts on most users never opening the case, and on the Home Assistant integration not being able to do anything with encrypted flash sections. The walled garden is the whole point.
The first thing Daniel needs to do is get one of these sacrificial units on a workbench and open it up. What's he looking for inside?
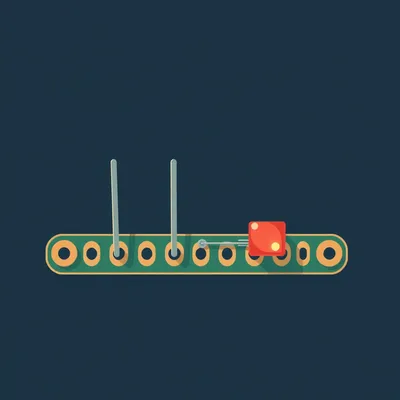
The RM4 Mini is held together with plastic clips — no screws, which is actually a mercy. A spudger or a guitar pick around the seam will pop it open. Once you're inside, you'll see the main board with the ESP8266 chip front and center. It's usually an ESP-WROOM-02 module or similar. Next to it, the SPI flash chip — typically a Winbond W25Q16 or equivalent, two megabytes. The IR receiver is the three-pin component with the metal shield can, usually a VS1838B or TSOP38238 variant. And then there's the IR LED array — usually three or four five-millimeter LEDs in series.
The UART pins you mentioned — those are the entry point for flashing?
On the RM4 Mini, the UART pins are typically labeled TX, RX, GND, and sometimes VCC or three-point-three-volt. You'll need a USB-to-serial adapter — an FTDI FT232 or a CP2102, set to three-point-three volts, not five volts. Connect ground to ground, TX on the adapter to RX on the board, RX to TX. For the ESP8266, you also need to pull GPIO zero low during boot to enter flashing mode — that usually means connecting GPIO zero to ground while powering up. py can read the flash, erase it, and write new firmware.
Before he flashes anything, you're saying he should dump the existing firmware first. What would he actually find in that dump?
If you take the full two-megabyte flash dump and open it in a hex editor, you'll see the typical ESP8266 firmware layout — bootloader at the start, then the application code, then a section for the file system or configuration data. The IR codes are stored as raw timing arrays. You can actually search for patterns — look for sequences of sixteen-bit integers that start with something like nine thousand microseconds, which is the typical NEC protocol leader pulse. The Electra units Daniel's dealing with almost certainly use NEC protocol at thirty-eight kilohertz carrier — that's the standard for that brand in the Israeli market.
The encryption — is that actually strong encryption, or is it more of a "we XOR'd it with a constant and called it a day" situation?
That's the question, isn't it? Broadlink uses AES encryption for the learned codes on the RM4 series, but here's the thing — the key is derived from the device's MAC address and a fixed string in the firmware. It's not uncrackable. There are tools on GitHub that can extract the key from a firmware dump and decrypt the code table. But honestly, for Daniel's purposes, dumping the firmware to extract codes is the long way around. The faster path is to flash the unit with open firmware that exposes the IR receiver directly, then just re-learn the codes.
Let's talk about those open firmware options. Tasmota-IR for the ESP8266 — that's been around since twenty eighteen, right?
Yes, and it's remarkably mature. Tasmota-IR is essentially Tasmota with the IR remote support compiled in. Once flashed, it exposes IR send and receive through MQTT topics. The command to send a raw IR code looks like cmnd/tasmota_ir/IRsend followed by the raw timing data in a JSON payload. For receiving, you put the device in learning mode with IRrecv, point your remote at it, press a button, and the captured timings come back as an MQTT message with microsecond precision. You can then pipe that directly into Home Assistant as an MQTT sensor or use Node-RED to translate it into service calls.
Because it's MQTT, there's no cloud dependency at all. The codes live in your broker, your automations fire locally, and Broadlink's servers never touch the data.
That's the whole point. The flashing process for the RM4 Mini is straightforward: connect the FTDI adapter, hold GPIO zero low during boot, run esptool.py erase_flash to wipe the stock firmware, then `esptool.py write_flash 0x00000 tasmota-ir.Reboot, connect to the Tasmota WiFi access point, configure your network, and you're done. The whole process takes maybe thirty minutes if you've never done it before, fifteen if you have.
If you mess up, you've bricked a fifteen-dollar device that Daniel was willing to sacrifice anyway. The risk-reward here is absurdly favorable.
It really is. But there's a nuance worth flagging. Daniel mentioned he's keeping one unit stock as a "control surface" that still works through the app. That's actually the smartest approach for a renter. You buy a second identical unit — fifteen to twenty dollars — flash that one, and leave the landlord's original untouched. The landlord's unit still works through the Broadlink app for the next tenant, and your flashed unit becomes a dedicated Home Assistant bridge that sits on the network doing nothing but IR over MQTT. No conflict, no warranty voiding on someone else's property, and you take your bridge with you when you move out.
That's the renter-friendly version of "measure twice, cut once." Now, you mentioned the BK7231T chipset — that's the one in the Tuya-based blasters, right? The ones that use the Smart Life app?
Yes, and these are actually more common now than the ESP8266 units because the BK7231T is cheaper. Tuya has been aggressively pushing it. The flashing process is different and honestly more annoying. You need a specific USB-to-UART adapter — the Beken-USB adapter, or you can use a generic one with some extra wiring for the chip's boot mode. The tool is called ltchiptool, and the firmware is OpenBeken, which was first released in twenty twenty-two. OpenBeken supports IR send and receive via MQTT topics just like Tasmota, but the SDK is less mature, the documentation is spottier, and the community is smaller.
If Daniel is shopping for a sacrificial unit to flash, he should specifically look for ESP8266-based ones. How does he tell before buying?
The easiest way is to check the FCC ID on the bottom of the device and look up the internal photos in the FCC database — those are public. The RM4 Mini with FCC ID 2ATEV-RM4MINI clearly shows the ESP8266 module in the teardown photos. For Tuya devices, it's harder because they use multiple chipsets across different production runs. The general rule: if it says "Smart Life" on the box and costs under ten dollars, it's probably a BK7231T. If it's a Broadlink device from before twenty twenty-three, it's almost certainly ESP8266. Newer Broadlink revisions have started moving to other chipsets, which is why I'd say grab an older RM4 Mini if you can find one.
Let's talk about the IR codes themselves for a minute, because this is where a lot of people get stuck even after flashing. Daniel's dealing with Electra air conditioners. You mentioned NEC protocol at thirty-eight kilohertz — what does he actually need to capture?
NEC protocol is one of the most common IR protocols for air conditioners. It uses a leader pulse of nine thousand microseconds, a space of forty-five hundred microseconds, and then a thirty-two-bit data payload. The bits are encoded by the length of the space between pulses — a short space for a zero, a long space for a one. But here's the complication with air conditioners: unlike a TV remote that sends a single command like "volume up," an AC remote typically sends the entire state — temperature, mode, fan speed, swing direction — in one burst. So the thirty-two-bit payload encodes all of that at once.
Which means you can't just learn "cool" and "twenty-four degrees" separately and combine them. You need to capture the exact code for "cool mode, twenty-four degrees, fan auto, swing off" as a single command.
And Electra's code mappings aren't well-documented in the public databases. The LIRC database has some Electra codes, but they're sparse and often for different models. This is where Daniel's logic analyzer suggestion comes in — and I want to walk through that because it's genuinely useful. If you connect a logic analyzer probe to the output pin of the IR receiver on the board, you can capture the exact demodulated signal as the remote sends it. The receiver strips the thirty-eight-kilohertz carrier and gives you the clean envelope — just the on-off timings. You can read those directly in PulseView or Sigrok, convert them to the format Tasmota expects, and you've got your code.
The workflow is: use the stock unit's app to trigger the IR command, capture it with a logic analyzer on the flashed unit's receiver, decode the timings, and feed them back into Tasmota as an IRsend command. That's elegant — you're using the app as the code generator and the hacked hardware as the capture device.
Once you've captured all the codes you need — cool at various temperatures, heat, fan speeds, modes — you store them in Home Assistant as scripts or template entities, and you never touch the app again. The whole thing runs locally.
There's another path here that doesn't involve flashing at all, and I want to make sure we cover it because not everyone is comfortable with a soldering iron and esptool. Daniel mentioned he's open to tearing things apart, but for the listener who isn't — what about building a standalone IR bridge with a Raspberry Pi?
The Pi Zero 2 W is perfect for this. It's about fifteen dollars for the board, plus a microSD card, plus a TSOP38238 IR receiver — that's under two dollars — and an IR LED with a transistor driver circuit. Total cost maybe thirty-five dollars. The software stack is irrp.py from the pigpio library, which handles IR recording and playback with microsecond precision, and paho-mqtt for the MQTT bridge. You wire the IR receiver to a GPIO pin, wire the IR LED through a transistor to another GPIO pin, write a simple Python script that listens for MQTT commands and calls irrp.py to play them back, and you've got a fully local, fully portable IR bridge.
The advantage over flashing the Broadlink is that this doesn't touch the landlord's hardware at all. It's a completely separate device that you plug in next to the AC unit, connect to WiFi, and it just works. When you move out, you unplug it and take it with you.
The tradeoff is time and complexity. The Pi approach takes about two hours to set up from scratch — you're installing an OS, configuring pigpio, writing the Python bridge, testing the IR codes. The flashing approach takes thirty minutes but requires opening hardware and potentially bricking something. For Daniel, who's already bought three blasters and is willing to sacrifice two, flashing is the obvious choice. For someone who's never held a soldering iron, the Pi bridge is safer.
Let's zoom out for a second, because there's a bigger pattern here that drives me up the wall. These companies — Broadlink, Tuya, the whole ecosystem — they're selling hardware at or below cost. The RM4 Mini is fifteen dollars. The bill of materials — ESP8266, flash, IR LEDs, receiver, power supply, plastic case — probably costs them twelve or thirteen dollars. They're making almost nothing on the hardware. The money is in the cloud.
The cloud subscription, the data harvesting, the app engagement. Every time you open the Broadlink app to turn on your AC, they're collecting usage patterns, timing data, device telemetry. That's the real product. And the learned IR codes are a monetization vector — they're the thing that keeps you coming back to the app, which keeps the data flowing. If they exposed those codes through the local API, you'd set up Home Assistant once and never open their app again. Their entire business model evaporates.
The encryption on the flash isn't a security feature. It's a retention feature. They're not protecting you from hackers — they're protecting their revenue stream from you.
This is why the open firmware community matters so much. Tasmota and OpenBeken aren't just technical projects — they're a direct challenge to that business model. When you flash a device, you're not just gaining local control, you're opting out of the surveillance economy that subsidized the hardware. The fifteen dollars you paid for the RM4 Mini didn't cover its cost — Broadlink expected to make that back through the app. By flashing it, you're breaking that equation.
Which, I have to say, I'm completely fine with. If your business model depends on holding my air conditioner codes hostage, I don't owe you a revenue stream.
There's a practical implication here for the listener who's renting and thinking "I don't want to get into a fight with my landlord about modified hardware." The solution Daniel landed on — buy your own unit, flash it, leave the landlord's alone — is the right one. It's also the ethical one, I'd argue. You're not depriving the landlord of anything. Their unit still works. The next tenant can still use the app. You've just added a parallel control path that you own.
At fifteen to twenty dollars per unit, this is one of the cheapest smart home upgrades you can make. We've talked about renter-friendly stacks before — SwitchBot Curtains, Philips Hue bulbs — but this is an order of magnitude cheaper for something that controls the single biggest energy consumer in an Israeli apartment.
The air conditioner. Which in an Israeli summer is not optional. And this is where the Electra app situation makes everything worse. Electra has a proprietary app that polls their cloud every thirty seconds. The Home Assistant integration exists but it's brittle — it relies on reverse-engineered API tokens that expire, and the polling latency means your automations have a thirty-second lag. With a local IR bridge, you're sending commands in under a hundred milliseconds and getting state feedback instantly if you set up a power monitoring plug on the AC unit.
The decision tree for Daniel — and for anyone in this situation — is pretty clear. Step one: identify the chipset. If it's ESP8266, flash Tasmota-IR. If it's BK7231T, flash OpenBeken with ltchiptool. If it's something else — Realtek, Qualcomm, some undocumented MediaTek thing — don't bother, there's no open firmware for it. Step two: learn the IR codes for your specific AC model, either by using the flashed unit's IR receiver in learning mode or by capturing with a logic analyzer. Step three: wire those codes into Home Assistant via MQTT and build your automations. Step four: contribute the codes back to the LIRC database or the Tasmota IR codes repository so the next person doesn't have to do this.
That last step is important. The Electra codes are currently a gap in the public databases. Daniel's captures could save someone else hours of work. The IRDB and LIRC databases are community-maintained, and the Israeli market is underrepresented. Even just posting the raw timings to the Tasmota IR codes thread on GitHub would be a meaningful contribution.
For the listener who's thinking "I don't want to mess with firmware at all," the Pi Zero 2 W bridge is a completely valid alternative. It's more work upfront but zero risk to any hardware, and it's fully portable. You can take it from apartment to apartment, reprogram it for different AC units, and it works with anything that speaks IR.
The one thing I'd add is to be careful about the IR LED driver circuit. You can't just connect an IR LED directly to a GPIO pin — it won't draw enough current to reach across the room. You need a transistor — a 2N2222 or similar NPN — with the base connected to the GPIO through a resistor, the emitter to ground, and the collector to the LED through a current-limiting resistor. That gives you enough drive strength to bounce the signal off walls and reach the AC unit reliably.
That's the kind of detail that separates "I read a tutorial" from "I've actually done this and it worked." And I appreciate that you've clearly done this.
I may have bricked a thing or two in the process. The first time I tried flashing an RM4 Mini, I had the FTDI adapter set to five volts instead of three-point-three. The ESP8266 is not five-volt tolerant. There was a brief, very small puff of smoke, and then there was a paperweight. So — double-check your voltage.
That's a Herman Poppleberry cautionary tale if I've ever heard one. The walking encyclopedia, occasionally walking into a wall.
The wall was well-documented. I just failed to read the documentation.
To pull this all together — Daniel's core insight was right. The only thing standing between a fifteen-dollar IR blaster and a fully local Home Assistant integration is the manufacturer's desire to keep you in their app. The hardware is capable, the open firmware exists, and the flashing process is well-documented. The barrier isn't technical — it's a business model that treats your learned IR codes as a retention mechanism.
The fix is straightforward enough that anyone with a USB-to-serial adapter and a willingness to open a plastic case can do it in an afternoon. The broader question, though, is whether this whole category of devices even has a future. Matter and Thread are supposed to make IR blasters obsolete — every new AC unit should eventually speak IP natively. But we're years away from that being universal, especially in rental markets where landlords are installing the cheapest units they can find. Until then, reverse-engineering cheap IR hardware is going to remain a critical skill for the smart home hacker.
On that note — if Daniel or anyone else successfully captures a full set of Electra IR codes, send them in. We'll make sure they get into the right repositories. The next person renting an apartment in Tel Aviv with an Electra AC will thank you.
Before we wrap, I want to flag one thing for the listener who's about to open up their RM4 Mini. Newer revisions — units manufactured in the last year or so — have started shipping with the UART pins disabled in firmware. The pads are still on the board, but the ESP8266's UART is reconfigured as GPIOs in the stock firmware. If you run into this, you can still flash by desoldering the flash chip and programming it directly with a clip-on programmer, but that's a significantly more involved process. Check the manufacturing date on the box before you buy — older stock is easier to work with.
Which brings us to the open question: will the next generation, the Broadlink RM5 or whatever comes after, lock things down even further? Disabled UART, disabled JTAG, encrypted bootloaders that refuse to run unsigned firmware? Or will the open-source community find new attack surfaces — side-channel timing attacks on the IR receiver, glitching attacks on the power rail, the kind of things we see in hardware security research?
The cat-and-mouse game never ends. But for now, the mouse is winning — and the tools are accessible enough that you don't need to be a hardware security researcher to use them. That's the thing I want listeners to take away. This isn't esoteric. It's a USB cable and some open-source software.
Now: Hilbert's daily fun fact.

In the late Victorian period, a small cocoa plantation on São Tomé and Príncipe experimented with tinting confectionery using a copper-arsenic pigment known as emerald green, producing vividly colored sweets that were briefly fashionable in Lisbon before the connection between the pigment and acute poisoning became undeniable.
...right.
This has been My Weird Prompts. If you've got a hardware hacking story or a set of IR codes to share, email the show at show at my weird prompts dot com. We're at my weird prompts dot com. I'm Corn.
I'm Herman Poppleberry. Go flash something responsibly.