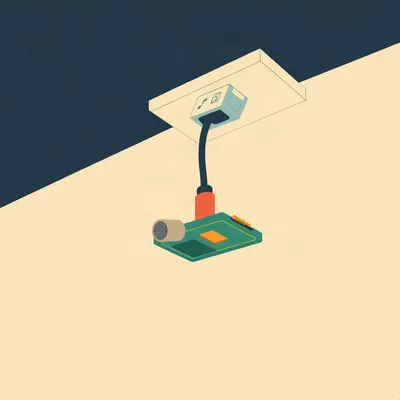
Daniel's got a whole thing this week. He's about to leave town for the summer, and right next door a construction site is just getting into its excavation phase — drilling into rock, coating the porch in fine dust. He wants to know what's happening while he's gone, not just hear secondhand reports. So he's designed a weatherproofed porch sensor system, and he's asking us to walk through the whole thing: the bill of materials and why each part was chosen, the enclosure design and air paths, what thresholds the Home Assistant automations should actually encode, where to mount the box for comparability over time, and whether anything in his parts list is the wrong call or missing entirely.

This is a great project. I mean, he's essentially building a citizen-science construction monitor for about a hundred and twenty bucks. The question he actually wants answered is specific: how loud is the drilling, at what times of day, and is anything getting better week over week? Everything reports into Home Assistant, which he can reach remotely, so the record is visible from anywhere.
I have to say, this is a deeply specific obsession. Most people leave town and just ask a neighbor to water the plants. Daniel leaves town and builds a multi-sensor environmental monitoring station.
To be fair, the neighbor can't tell you whether the drilling peaked at seventy-two decibels at six in the morning last Tuesday. This thing can.
Fair enough. And I'll admit, there's something satisfying about coming home to a complete record of what happened while you were gone rather than a vague "they were pretty loud, I think." So let's build him a porch monitor.
Alright, so let's start with the big picture. What is this system actually trying to do? Because that drives every decision downstream.
It's not trying to be a lab-grade instrument. Daniel says that explicitly — he's targeting plus or minus two to three decibels, good enough for solid trends and documentation, not a court-grade Class 1 meter. And no audio recording of any kind. Only aggregate levels ever leave the device.
Right. And that's the right call on multiple levels. First, legally — recording audio of a construction site, even your own porch, can get weird depending on local laws. Second, practically — streaming raw audio over Wi-Fi would chew through bandwidth and storage. What he wants is numbers: decibel levels, particulate counts, maybe a vibration index. Trends over time.
So the core design constraint is: everything reports into Home Assistant, which Daniel can reach remotely. That means Wi-Fi, not Zigbee or Thread. And it means ESPHome, not custom firmware. He looked at three connectivity options and eliminated two of them for good reasons.
Let's walk through that, because it's actually a useful framework for anyone building a mains-powered sensor. Zigbee's whole advantage is battery efficiency. You can run a Zigbee temperature sensor on a coin cell for two years. But Daniel's porch has an existing waterproof power port, so that advantage evaporates completely. And going Zigbee would have cost him days of custom firmware work — porting the esp-zigbee-sdk, writing a Zigbee2MQTT external converter. It's just not worth it when you've got mains power right there.
And Matter over Thread — he eliminated that outright. Matter defines no sound-level cluster, so the readings wouldn't surface cleanly in Home Assistant anyway. You'd be building a custom cluster, which defeats the purpose of using a standard.
So Wi-Fi plus ESPHome it is. Mains-powered, continuous measurement rather than periodic samples. And he chose the Seeed XIAO ESP32C6 as the brain. Now, the C6 has an 802.15.4 radio for Zigbee and Thread that's going completely unused in this build. So why pay the roughly five dollar premium over a plain ESP32?
Because he's keeping the Zigbee fallback a reflash away. If something changes — if Wi-Fi becomes unreliable, if he wants to redeploy the board for a different project later — that radio is there. Five dollars for future flexibility on a fifty-plus dollar project is a reasonable insurance policy.
I agree. And the XIAO form factor is nice for this — tiny board, eleven GPIO pins, USB-C. He's using three pins for I2S audio, two for UART to the dust sensor, and there's still I2C left over for the accelerometer. Comfortable pin budget.
Alright, let's get into the weeds. Starting with the noise sensor — this is the heart of the whole build. He's using an INMP441 I2S MEMS microphone. What is that, and why not just use an analog electret mic?
The INMP441 is a digital MEMS microphone with I2S output. The key word there is digital. An analog mic would feed a tiny voltage into the ESP32's ADC, and those ADCs are notoriously noisy and non-linear. You'd be fighting the hardware the whole time. The INMP441 outputs clean digital samples over I2S, which is a standard audio protocol that ESP32s handle natively. It costs about three dollars and twenty-seven cents on AliExpress, and Daniel's buying three of them so he can keep the best-calibrating unit.
Three dollars versus two thousand dollars for a Class 1 lab-grade microphone. And the accuracy difference?
A Class 1 meter is plus or minus about half a decibel. The INMP441, once calibrated, is plus or minus two to three decibels. For trend tracking — is the noise getting better or worse week over week — that's completely sufficient. The absolute number might be off by a couple of decibels, but the change over time will be real.
And the software side is what makes this actually work without writing DSP code from scratch. He's using the ESPHome sound-level-meter component by stas-sl.
This component is the secret weapon of the whole project. Out of the box, it gives you A-weighted equivalent continuous sound level — that's LAeq — plus Lmax, which is the maximum level during the measurement period. It applies INMP441 EQ correction, which compensates for the microphone's frequency response curve. And it has a calibration offset you can set after comparing against a reference meter.
So he's not building a sound level meter from scratch. He's configuring an existing, well-tested ESPHome component. That's the difference between a weekend project and a month of signal processing headaches.
And the component does more than just basic levels. Daniel mentioned he wants continuous LAeq plus averages over five, thirty, and sixty minutes, and max and min over sixty minutes. The component supports all of that through ESPHome's sensor averaging filters. You define the raw sensor, then create template sensors with sliding window averages at different durations.
He also mentioned octave-band frequency analysis. What's that about?
The sound-level-meter component has filter groups that can split the audio into frequency bands — think of it like a graphic equalizer in reverse. Low-frequency rumble from drilling and excavation sits in different bands than high-frequency cutting or grinding whine. So with one microphone, he can potentially distinguish what kind of machinery is running, not just how loud it is. That's genuinely useful for documentation — "the low-frequency drilling started at seven fifteen AM and peaked at eighty-two decibels" is a much stronger record than "it was loud."
Now, the second sensor — dust. He's adding a Nova SDS011 for PM2.5 and PM10 particulates. Why this sensor specifically?
The SDS011 is kind of the standard workhorse for citizen-science air quality monitoring. It uses a laser scattering principle — a tiny fan pulls air through a chamber, a laser shines through it, and a photodiode measures how much light bounces off the particles. It outputs PM2.5 and PM10 in micrograms per cubic meter over UART. It costs about twenty to twenty-four dollars on AliExpress. And it's supported natively in ESPHome — there's a dedicated SDS011 component.
But lasers have a limited lifespan, right? If you run it continuously, the laser diode burns out.
That's the key design consideration. The SDS011's laser is rated for about eight thousand hours of continuous operation. If you ran it twenty-four seven, that's less than a year. So Daniel's duty-cycling it: the fan and laser run for about thirty seconds per five-minute reading cycle. That's a ten percent duty cycle, which extends the effective laser life to years.
And the ESPHome SDS011 component handles that duty cycling natively?
It does. You set the update interval — say, five minutes — and the component wakes the sensor, waits for it to stabilize, takes a reading, then puts it back to sleep. That's why it needs both TX and RX on the UART — the sleep and wake commands go from the ESP32 to the sensor on the TX line, and the readings come back on RX.
Alright, third sensor — vibration. He's got an MPU6050 accelerometer as an optional add-on. What does that actually tell you?
The MPU6050 is a six-axis accelerometer and gyroscope, costs about two dollars and fifty-eight cents on a GY-521 breakout board. For this application, he'd mount it rigidly to the enclosure, which is itself rigidly mounted to the porch structure. When drilling into rock happens, you feel it through the ground before you hear it — low-frequency vibration travels through the structure. The MPU6050 gives you a relative vibration index. It's not calibrated in engineering units like millimeters per second, but it'll show you clear spikes when heavy machinery is running.
So it's a corroborating data point. If the noise sensor shows a spike and the vibration sensor shows a spike at the same timestamp, you know it's real and not just a loud motorcycle passing by.
And the MPU6050 is supported natively in ESPHome — there's a dedicated component for it. Daniel also noted that if he ever needed calibrated-grade vibration measurements, he could swap in an ADXL355 for about twenty-five dollars. But for now, the two-dollar MPU6050 is the right call.
Let's talk about the enclosure, because this is where a lot of outdoor projects fail. You can have perfect electronics inside, but if water gets in or the sensors can't breathe, it's all useless.
The enclosure design here is really thoughtful. He's using an ABS box, about one-fifty by one-ten by seventy millimeters — upsized from the noise-only variant to hold the SDS011. ABS is UV-resistant enough for outdoor use, and these boxes are widely available on AliExpress for a few dollars.
But here's the tension: the electronics need to stay dry, but the particulate sensor needs to breathe. You can't just seal everything in an IP65 box and call it done.
Right. So he's using what's called the Luftdaten pattern. Luftdaten is a citizen-science air quality project, and they've figured out a really elegant enclosure design. The particulate sensor gets its own air path: a short silicone tube on the inlet leads to a downward-facing intake, and there's a downward exhaust opening. Rain can't get in because the openings face down, but air flows freely. The electronics compartment — the ESP32, the mic, the wiring — stays separate and gets its own desiccant pack to handle any humidity that does get in.
And the microphone — that's sealed behind a breathable vent plug?
An IP67 ePTFE breathable vent plug. ePTFE is expanded PTFE — same family as Gore-Tex. It lets air pressure equalize and sound pass through, but blocks liquid water and dust. It costs maybe half a decibel to one decibel of attenuation, which the calibration offset absorbs. Daniel's buying a pack of M12 vent plugs for about six dollars and twenty-nine cents.
So the box ends up weather-resistant, not weatherproof. That's the right distinction. IP65 means dust-tight and protected against water jets — you'd need gasketed cable glands and a sealed lid, and even then the particulate sensor couldn't breathe. Weather-resistant means it'll survive rain, dust, and porch conditions, but you wouldn't submerge it.
And he's using a PG7 cable gland for the USB power cable entry. That's a standard size, widely available. You drill a hole in the box, screw in the gland, run the cable through, and tighten the compression nut. It's not submersible, but it'll keep rain out.
Total power draw — about half a watt average, peaking around two hundred milliamps when the SDS011 fan and laser are running. Any USB power supply can handle that. He mentioned the porch already has a waterproof power port, so that's solved.
Let's run through the full budget before we get into the software and thresholds. Noise-only variant: about fifty-three dollars. That's two Seeed XIAO ESP32C6 boards at about sixteen sixty-six — one working unit plus a spare. Two classic ESP32 DevKit V1 WROOM-32 boards at about ten dollars fourteen cents — those are firmware insurance in case the C6 has issues with the sound-level-meter component, plus bench spares for testing. Three INMP441 mic modules at three dollars twenty-seven each, about nine eighty-one total. A five-volt USB adapter and USB-C cable bought locally for about four dollars. The smaller ABS box, roughly one hundred by sixty-eight by fifty millimeters, about three dollars. The M12 ePTFE vent plug pack, six twenty-nine. PG7 cable glands, about a dollar. Wire, standoffs, desiccant, about two fifty.
And the noise-plus-dust variant, which is his plan of record?
About seventy-eight dollars. Same as above, plus the Nova SDS011 at twenty fifty — he found the sensor-only option, no USB adapter needed since it connects directly to the ESP32. A silicone intake tube for about a dollar fifty. And the larger ABS box, about one-fifty by one-ten by seventy, adds about two fifty over the small one. Add the MPU6050 for vibration and you're at about eighty-one dollars.
Plus the calibration meter. He's using a GM1356 sound level meter for one-time calibration.
The GM1356 is about thirty-seven dollars on AliExpress. And here's a real tip: the actual price band is thirty-seven to forty-five dollars. Some listings show ninety dollars for the exact same unit. Don't pay ninety dollars for a GM1356. It's a basic Class 2 meter, perfectly adequate for calibrating a MEMS microphone — you hold it next to the enclosure, play a reference sound or use ambient noise, and adjust the calibration offset in ESPHome until the readings match.
So the full order — noise plus dust, vibration, calibration meter, spares — is about a hundred and eighteen dollars. That's remarkably cheap for what you're getting.
It really is. A commercial outdoor noise monitor with cellular connectivity runs two to five thousand dollars. This is two orders of magnitude cheaper and gives you more flexibility.
Alright, so we've got the hardware figured out. But the hardware is just the beginning. The real question is: what do you do with all this data? What thresholds should the Home Assistant automations actually encode?
This is where the system goes from data collection to actual utility. Let's start with noise. The World Health Organization guidelines recommend fifty-five decibels daytime and forty decibels nighttime for outdoor residential areas. But those are for general environmental noise, not construction. Construction noise is different — most municipalities allow higher levels during permitted hours.
So what's a reasonable tiered approach?
I'd suggest three tiers. A yellow alert at sixty-five decibels A-weighted — that's noticeable, conversation becomes difficult, but it's not necessarily actionable. An orange alert at seventy-five decibels — that's likely violating typical construction noise ordinances, and it's the level where you'd want to start documenting. A red alert at eighty-five decibels — that's the threshold where prolonged exposure risks hearing damage. OSHA requires hearing protection at eighty-five decibels over an eight-hour workday.
And you'd want different automations at each tier. Yellow might just log it. Orange sends a notification. Red sends an urgent notification and maybe flags the timestamp for follow-up.
And for particulates, the EPA twenty-four-hour standard for PM2.5 is thirty-five micrograms per cubic meter. For a construction site, which is going to be dustier than ambient, I'd suggest a yellow alert at fifty micrograms per cubic meter and a red alert at one hundred. For PM10, the EPA twenty-four-hour standard is one hundred fifty micrograms per cubic meter, with a yellow alert at two hundred.
But the real power of this system is the out-of-permitted-hours detection. That's where it goes from "interesting data" to "potentially actionable documentation."
This is the killer feature. Most construction noise ordinances restrict work to something like seven AM to seven PM on weekdays, and maybe eight AM to five PM on Saturdays, with no work on Sundays. In Jerusalem, the municipal bylaws are going to be similar. Daniel should encode a Home Assistant automation that checks two conditions: is the noise level above fifty-five decibels, and is the current time outside permitted hours? If both are true, send a push notification.
But you need to be smart about notification fatigue. If the drilling runs for three hours on a Saturday morning, you don't want a hundred and eighty notifications.
Right. Use a cooldown — one alert per hour for ongoing violations. And consider a "first violation of the day" alert that fires once and then suppresses further alerts for the same type of violation. Home Assistant has a rate limit helper that handles this cleanly.
He should also set up a daily summary automation. Every morning, send a report with the previous day's maximum noise level, peak PM2.5, any out-of-hours violations, and maybe a trend indicator — was yesterday better or worse than the day before?
That's a great idea. And Home Assistant can generate that from the historical data. Use the statistics sensor to pull the max value from the last twenty-four hours, compare it to the day before, and format it into a notification.
Now, Daniel asked specifically about mounting — where should the box go for comparability over time? Because if you move the sensor, you change the measurement.
The key principle is consistent acoustic coupling. The box should be mounted in the same location every time it's deployed. At least one point five meters above the ground to avoid ground reflection effects — sound bounces off hard surfaces and creates constructive and destructive interference patterns near the ground. At least one meter from any reflective surface — walls, railings, windows. Ideally, mount it on a bracket that extends from the porch railing, facing the construction site directly.
And the microphone orientation matters. The INMP441 should be pointed toward the noise source, with the vent plug facing the site.
Yes. And the box needs to be secured so it doesn't vibrate or move in the wind. A rattling enclosure will create its own noise that the microphone picks up. Use rigid mounting — screws into the porch railing or a heavy clamp, not zip ties that can loosen.
He also needs to think about seasonal effects. If he deploys this in summer and then checks it again in winter, the readings might shift. Leaves on trees absorb sound, snow cover changes ground reflections, ambient temperature affects air density and sound propagation. None of this invalidates the data — it just means you note the conditions when you deploy.
And that's where the calibration check comes in. Before each deployment, or at least seasonally, run the GM1356 next to the enclosure and verify the offset hasn't drifted. If it has, update the calibration value in ESPHome.
Now, Daniel asked the hard question: is there anything in this parts list that's the wrong call, or anything missing?
I've got two things. First, the biggest gap I see is temperature and humidity compensation for the SDS011. Particulate sensors are sensitive to humidity. Above about seventy percent relative humidity, particles can absorb water and swell, which makes the laser see them as larger than they actually are. You get over-reads — the sensor reports PM2.5 values that are higher than reality. Daniel mentioned he considered a BME280 temperature and humidity sensor and dropped it, reasoning that city weather data suffices.
And does it?
For temperature, yes. For humidity, maybe not. The humidity on a porch — especially one near a construction site that might be using water for dust suppression — can be different from the city weather station a few kilometers away. A BME280 costs about two dollars on AliExpress and connects over I2C. It would let him log local humidity alongside the particulate readings and apply a correction factor if needed.
You're saying add the two-dollar sensor back in.
I think it's worth it. It's not critical — the system will work without it — but it improves the data quality for almost no cost. And ESPHome supports the BME280 natively.
What's the second thing?
The INMP441's frequency response. It rolls off below about one hundred hertz. That means low-frequency drilling rumble — the kind you feel in your chest — might be under-reported by two to three decibels. The calibration with the GM1356 helps, but the listener should know this limitation. If the site is doing heavy rock drilling with low-frequency vibration, the reported levels might be slightly lower than what a Class 1 meter would show.
The numbers are conservative — the actual low-frequency noise might be worse than what the sensor reports.
Correct. And there's one more practical addition I'd recommend: a foam windscreen for the microphone. Even a simple one, like the kind that comes with lavalier mics, can reduce wind noise by ten to fifteen decibels. Outdoor measurements without a windscreen can be dominated by wind noise, especially on a breezy porch. You can get a pack of foam windscreens for a couple of dollars on AliExpress, or honestly, a scrap of open-cell foam works fine.
What about the Wi-Fi reliability? If the porch has poor signal, the ESP32C6 might disconnect and lose data. He's going to be away all summer — he can't walk over and reboot it.
This is worth testing before he leaves. Put the ESP32 in its enclosure on the porch, power it up, and check the Wi-Fi signal strength in the ESPHome logs. If it's below about negative seventy-five dBm, it's marginal. A couple of mitigations: first, ESPHome has a reboot timeout — if the device can't reach the API for a configurable period, it reboots itself. Set that to maybe fifteen minutes. Second, Home Assistant can monitor whether the device is online and send an alert if it drops off for more than an hour. That way, if the thing goes down, he knows and can ask someone local to check it.
Power reliability? He mentioned a waterproof power port on the porch.
That's ideal. The only thing I'd add is: make sure the USB power supply is rated for outdoor use or is itself in a weather-protected location. A standard indoor USB charger plugged into an outdoor outlet will eventually corrode or fail from humidity. Use an outdoor-rated USB power supply, or put the charger in a weatherproof box with the cable running out through a gland.
Let's talk assembly sequence. If someone's following along at home, what's the order of operations?
Step one: bench test everything on a breadboard first. ESP32C6, INMP441, SDS011, optional MPU6050. Get ESPHome flashed, get the sound-level-meter component configured, verify you're getting readings. Do not put anything in an enclosure until you've confirmed the whole sensor chain works on your desk.
Step two: calibrate the microphone. Use the GM1356 held next to the bare INMP441, play some consistent noise — even just ambient room noise works — and adjust the calibration offset in ESPHome until the readings match within a decibel or two.
Step three: drill the enclosure. You need holes for the PG7 cable gland, the M12 vent plug over the microphone, and the two downward-facing ports for the SDS011 air path. Measure twice, drill once. ABS drills cleanly with a step bit or a standard twist bit — go slow to avoid cracking.
Step four: mount the components inside. Use standoffs for the ESP32 board — don't let it float around on wires. Secure the SDS011 so its intake and exhaust align with your drilled ports. Mount the INMP441 so it's pressed against the vent plug — you want the shortest possible air gap between the mic element and the outside world.
Step five: wire everything up. I2S from the INMP441 to the ESP32C6 — that's three wires: bit clock, word select, and data in. UART from the SDS011 — that's TX and RX crossed, plus five volts and ground. I2C from the MPU6050 and optional BME280 — that's SDA, SCL, three point three volts, and ground. Double-check your pin assignments against the ESPHome config before soldering.
Step six: add desiccant to the electronics compartment, close the box, and do a final calibration check through the assembled enclosure — not the bare mic. The vent plug adds a little attenuation, and you want the calibration to account for that.
Step seven: mount the box in its final location, run the USB cable through the gland, power it up, and verify it's reporting to Home Assistant. Check the Wi-Fi signal strength. Let it run for a day and verify the data looks reasonable before you leave town.
The common failure modes? What breaks first?
Number one: the SDS011 fan. It's a tiny mechanical part running in a dusty environment. Even with duty cycling, it can fail. If the particulate readings suddenly drop to near zero and stay there, the fan probably died. Number two: condensation inside the enclosure. If the desiccant saturates, you'll get moisture on the electronics. Check the desiccant pack before deployment and consider adding a small indicator card that changes color when it's spent. Number three: the USB connection corroding. A little dielectric grease on the USB-C connector before you seal the box can prevent this.
Let's pull all of this together into something actionable.
First: start with the noise-only variant and add dust later if you have time. The SDS011 adds real complexity — duty cycling, air paths, humidity compensation — and the noise sensor alone will answer the core question: how loud is the drilling, at what times of day, and is it getting better? You can always add the particulate sensor later.
Second: calibrate with the GM1356 before deployment, then trust the trends, not the absolute values. A two to three decibel offset doesn't matter if you're comparing week over week. What matters is consistency of mounting and measurement.
Third: encode the out-of-permitted-hours alert as a Home Assistant automation with a cooldown. One alert per hour for ongoing violations, plus a daily summary that arrives every morning with the previous day's max noise level, peak PM2.5, and any violations. That way you're informed without being overwhelmed.
Fourth: for listeners building their own version, there's a tradeoff worth mentioning. The ESP32-S3-BOX has a built-in I2S MEMS microphone and a display, and it runs ESPHome. It costs about thirty dollars more than the XIAO C6 plus INMP441, and it's not weatherproof out of the box. But if you're building an indoor version of this — say, monitoring a home office near a busy street — it's a clean all-in-one option.
If you go that route, you still need the enclosure and venting for outdoor use, so the cost savings evaporate. For Daniel's porch, the XIAO C6 plus separate INMP441 is the right call.
That leaves us with some open questions — both for Daniel and for the community. Has anyone actually tried octave-band frequency analysis with the INMP441 through the sound-level-meter component's filter groups? Can you reliably distinguish a jackhammer from a bulldozer from the frequency signature alone?
The humidity compensation question: what's the best practice for correcting SDS011 readings in a weather-resistant enclosure? Is a BME280 inside the box sufficient, or do you need to measure humidity at the intake port? These are the kinds of things the Home Assistant community is great at figuring out.
The broader implication here is interesting too. This kind of citizen-science sensor network could change how construction sites are monitored. Imagine a city where every affected porch has one of these, and the data feeds into a public dashboard. You'd have objective, timestamped evidence of noise violations, not just resident complaints.
At a hundred and eighteen dollars per unit, it's actually feasible. That's the exciting part. This isn't a five-thousand-dollar commercial monitor that only a municipality can afford. It's a weekend project with off-the-shelf parts.
Alright, on the record. Herman, give me a prediction.
Within two years, ESPHome will add a native sound-level sensor platform that doesn't require an external component — it'll be built into the core distribution, supporting I2S MEMS mics out of the box. The demand is clearly there.
I'll go a different direction. Within a year, someone will fork Daniel's planning repo and adapt it for indoor use — monitoring noisy neighbors through shared walls rather than construction sites. Same sensors, different enclosure, same ESPHome config. It's too useful a template not to spread.
That's a good bet. Alright, total approximate cost for the full build — noise plus dust, vibration, calibration meter, spares — about a hundred and eighteen dollars, roughly four hundred and thirty shekels. Have fun building it, Daniel. Send us a picture when it's mounted on the porch.
If you've built something weird — a sensor, an automation, a whole system — send it in. We want to hear about it. Thanks to our producer Hilbert Flumingtop. This has been My Weird Prompts. Find us at myweirdprompts.com or wherever you get your podcasts.
We'll be back next week. Go build something.