Daniel sends us this one, and I have to say — it is a deeply specific request. He wants a physical control panel for his home alarm system. Two buttons: one to arm, one to disarm. Two LEDs: red for armed, green for disarmed. The whole thing talking to Home Assistant, living in a nice enclosure near the door, built around an ESP32. He wants the parts list, the wiring, the case, ESPHome versus MQTT, and a step-by-step assembly guide. The full package.

That is the full package. I love it. I genuinely love this.
I know you do. I could feel you vibrating from across the room when this came in.
There is something deeply satisfying about a physical button. Like, your phone app is great, right, but at two in the morning when you hear something and you just want to arm the house, you do not want to unlock your phone, open an app, navigate to the alarm panel, tap confirm —
You want to slap a button.
You want to slap a button. That's the whole thesis of this project. And I think people underestimate how much cognitive load the app path adds in a moment of stress. Your hands are not steady, the screen brightness is blinding, Face ID does not work because you are squinting. The button just works.
There is a reason every elevator still has physical floor buttons even though you could theoretically do the whole thing with an app and a QR code.
The physical interface is not a failure of imagination. It is the correct solution to a specific problem. And Daniel has correctly identified that his front door is that problem.
By the way, today's script is courtesy of Claude Sonnet four point six, which I think is appropriate given that Daniel works in AI and probably has opinions about this.
Very on-brand for the show.
Before we get into the build, I do want to ask the obvious question, which is: Daniel, why not just buy a keypad? There are commercial alarm keypads that plug into Home Assistant. Reolink, Ring, DSC, you name it. Why are we building this from scratch?
That is a fair question. The honest answer is, if you just want a keypad and you are not particular about the stack, a commercial unit is faster. But there are real reasons to build. First, most commercial keypads are either cloud-dependent or they speak a proprietary protocol that requires a specific panel. Getting them into Home Assistant cleanly, with local control, no cloud dependency, no subscription — that is actually harder than it sounds.
Whereas if you build it yourself —
You own the whole stack. Your ESP32 talks to Home Assistant over your local network. Nothing leaves the house. No monthly fee. No "service discontinued" email in three years. And you get exactly the interface you want — two buttons, two LEDs, done. No menu system, no PIN code entry, no beeping at you for thirty seconds.
That last one is doing a lot of work for me personally.
The physical tactile interface thing is also having a moment right now in home automation circles. There's been this swing back toward dedicated hardware controls — people building wall panels, button clusters, physical dashboards. Because the all-app approach turned out to have some real friction in daily life.
We are not building something obsolete. We are building something that is, in a certain light, the sophisticated choice.
That is exactly what we are building. And it is a great beginner project too. The complexity is manageable, the cost is low, and the payoff is immediate and visible. You press a button, an LED lights up, your alarm arms. That feedback loop is very satisfying.
I am convinced. Let's build Daniel a control panel.
The core of this build is actually pretty simple to describe. You have got an ESP32 microcontroller sitting inside a wall-mounted enclosure. Two tactile buttons wired to it, two LEDs, and the whole thing talking to Home Assistant over your local network. That is the skeleton.
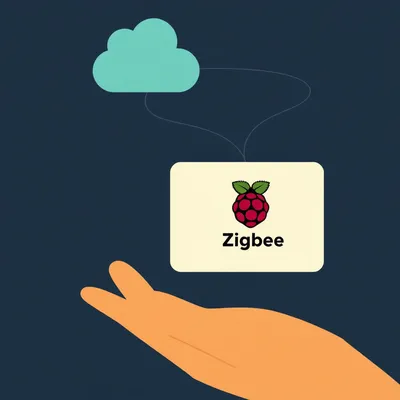
The Zigbee piece — where does that actually live in this? Because Daniel called it a Zigbee alarm panel, but the ESP32 is not inherently a Zigbee device.
Right, and this is worth clarifying up front. What Daniel is building is a control panel that integrates with a Zigbee-based alarm system already running in Home Assistant. The ESP32 itself communicates via Wi-Fi using ESPHome — it talks to Home Assistant, which is the hub that knows the alarm state. So Zigbee is the underlying alarm protocol, but the panel talks to Home Assistant, not directly to a Zigbee coordinator.
Home Assistant is the translator in the middle.
Home Assistant knows the alarm is armed or disarmed, the ESP32 asks Home Assistant what state we are in, and it lights up the appropriate LED. Press the arm button, it tells Home Assistant to arm. Clean separation of concerns.
Why Zigbee for the alarm side rather than, say, Z-Wave or plain Wi-Fi sensors?
Zigbee has a few things going for it here. Low power consumption on the sensor side, mesh networking so your door and window sensors extend range through each other, and the ecosystem is enormous — there are hundreds of compatible devices. Z-Wave is also solid but the hardware costs more. Wi-Fi sensors exist but they are battery killers and they crowd your network. For a home alarm with a dozen sensors, Zigbee is the practical choice most people land on.
Is there a range concern with Zigbee in a typical house? Like, if your coordinator is in a closet somewhere and your door sensor is at the far end of the building?
That is where the mesh piece really earns its keep. A single Zigbee coordinator might have a direct range of ten to fifteen meters, which in a house with walls and floors can get marginal. But every mains-powered Zigbee device — a smart plug, a light bulb, a relay — also acts as a router in the mesh. So your signal hops through the network. A house with six or eight Zigbee devices scattered around effectively has six or eight antennas. Battery-powered devices like door sensors are end nodes and do not route, but the mains-powered ones do. It is self-healing too — if one router drops out, the mesh finds another path.
The more Zigbee devices you add, the more robust the whole network gets. That is a nice property.
It is the opposite of Wi-Fi, where adding devices congests the network. Zigbee gets stronger as it grows. Anyway — the point is that for Daniel's alarm sensors, Zigbee is the right call, and his ESP32 panel sits on top of all of that through Home Assistant.
Alright, so now that we've got a clear picture of what this thing is, what's the first component we should focus on when building it?
The microcontroller, hands down. ESP32 is the right call here, and I want to explain why rather than just asserting it.
Because you always want to explain why.
The ESP32 has dual-core processing, built-in Wi-Fi, built-in Bluetooth, and as of the latest ESP-IDF firmware updates from early this year, it also supports Zigbee natively on the ESP32-H2 and ESP32-C6 variants. Though for this specific build we are not using the Zigbee radio on the microcontroller — we are using Wi-Fi to talk to Home Assistant. So the standard ESP32, the original dual-core variant, is perfectly fine and it is cheaper.
What about the ESP8266? Because I know that is the older sibling and people still have them in drawers.
The ESP8266 will technically work for a project this simple — two buttons, two LEDs, Wi-Fi connection to Home Assistant. But I would not recommend it for a new build. The memory headroom on the ESP8266 is tight, ESPHome has been pushing up against it for a while, and some of the newer ESPHome components just do not fit cleanly. The ESP32 has more RAM, more flash, more GPIO pins than you will ever need for this project, and it costs maybe two dollars more on AliExpress. There is no reason to start with the constrained option.
The ESP32 is the one you actually want, and the ESP8266 is the one you use because you already have it.
That is a clean way to put it. For the specific board, I would go with the ESP32-WROOM-32 on a standard thirty-eight pin development board. Search for "ESP32 WROOM dev board" on AliExpress and you will find them for roughly four to six dollars shipped. The NodeMCU-style form factor with the USB-C charging port is the most convenient for development — you can flash it directly from your laptop without a separate programmer.
Let's talk buttons. Because Daniel said tactile and durable, and I feel like there is a spectrum here from "momentary switch from a bag of a hundred" to something that actually feels like it belongs on a wall panel.
There is absolutely a spectrum. The cheap option is a twelve-millimeter momentary tactile push button, the kind that comes on a little PCB breakout. They work fine, they cost almost nothing — you can get fifty of them for three dollars. But for something mounted near the front door that you are pressing every single day, I would spend a little more. The recommendation I keep coming back to is the Omron B3F series. The B3F-1000 specifically. It is a through-hole tactile switch with a rated life of one million cycles, positive click feel, and it is available from AliExpress and also from Mouser if you want guaranteed genuine parts. Budget roughly fifty cents to a dollar per switch for the Omron, versus almost nothing for the generic.
One million cycles. Daniel is going to be pressing that button approximately twice a day. He will outlive the button by several civilizations.
The point is it will not get mushy after six months. Cheap tactile switches lose their feel. The click gets soft, the actuation force changes. For something you interact with every day, that degradation is noticeable and annoying. The Omron holds up.
Is there a tactile difference you can actually feel between the Omron and the generic, or is this one of those things where you have to be told which one is better?
No, you can feel it immediately. The Omron has a very clean, defined actuation point — there is a distinct snap when it registers. The cheap ones feel more like pressing into foam. Not terrible, but there is no confidence in the click. With the Omron you know the moment the button has registered. For an alarm panel where you want to be sure the thing armed, that tactile confirmation matters more than it would on, say, a decorative light toggle.
That is a good point. This is not a button you press and then look at a screen to confirm. The whole premise is that you press it and walk out the door.
The button has to communicate certainty. The Omron does that. The generic bag-of-fifty does not, at least not for long.
What about the LEDs?
Standard five-millimeter through-hole LEDs. Red and green, obviously. Get the diffused variety rather than clear — diffused gives you a softer, more even glow that reads better at an angle, which matters when it is mounted on a wall at head height. Brightness around two thousand to three thousand millicandela is plenty indoors. You do not need the ultra-bright blinding ones. A pack of mixed five-millimeter diffused LEDs on AliExpress runs about two dollars for a hundred.
You are going to have ninety-eight leftover LEDs.
Welcome to electronics. And here is a fun thing about the color choice that is worth mentioning — red and green are not arbitrary. They map directly to the psychological shorthand we have built up from traffic lights and status indicators over the past century. Red means stop, danger, locked. Green means go, safe, clear. When someone who has never seen your panel walks up to it, they already know what the colors mean. You get free affordance from a decision that costs you nothing extra.
The interface design is baked into the component.
Which is not always true in electronics. Sometimes you have to work to communicate what a thing does. Here the LED colors do it for you.
The ESP32 dev board runs on three point three volts logic, but the onboard regulator accepts five volts over USB. Your LEDs need a current-limiting resistor in series — without it you will burn them out immediately. For a three point three volt output pin driving a standard red or green LED with a forward voltage of around two volts, you want roughly a one-hundred-to-one-hundred-and-fifty ohm resistor. I use one-hundred-and-twenty ohm as a default for this setup. That puts your LED current at around ten milliamps, which is safe and plenty bright.
Buttons wire from a GPIO pin to ground, with the internal pull-up resistor enabled in firmware. So when the button is not pressed, the pin reads high. When you press it, it pulls to ground and reads low. No external resistor needed for the buttons if you are using ESPHome, because you configure the pull-up in software. That simplifies the wiring considerably.
Your actual wire connections are: LED positive leg to GPIO through a resistor, LED negative leg to ground. Button one leg to GPIO, other leg to ground. Repeat for the second button and second LED.
That is the whole circuit. Four GPIO pins total — two for buttons, two for LEDs. On the ESP32-WROOM dev board I would use GPIO four and GPIO five for the buttons, and GPIO eighteen and GPIO nineteen for the LEDs. Those pins are well away from the boot-sensitive pins — GPIO zero, GPIO two, GPIO fifteen — which can cause headaches if you accidentally pull them low during startup.
That is a trap I feel like Daniel would have hit.
It is the classic ESP32 beginner trap. And it is especially insidious because the symptom is not obvious — the board just fails to boot, or boots into a weird mode, and you spend an hour wondering if the board is defective before you realize it is a pin assignment issue. Avoid the boot-sensitive pins. The datasheet lists them, and the ESPHome documentation also calls them out. Worth a quick check before you finalize your wiring — especially since ESPHome is the tool we're using to get this thing talking to Home Assistant.
Speaking of ESPHome, I want to spend a minute on that choice because Daniel asked about ESPHome versus MQTT, and it's a real decision worth unpacking.
What is the case for MQTT?
MQTT is a lightweight messaging protocol — it stands for Message Queuing Telemetry Transport. Your ESP32 publishes messages to a broker, Home Assistant subscribes to those messages, and they pass state back and forth. It is extremely flexible, it works with almost any firmware, and if you are already running a Mosquitto broker on your Home Assistant instance, adding another device is trivial. The tradeoff is that you are writing your own firmware, managing your own message structure, handling your own reconnection logic. There is more code to maintain.
How much more code are we talking? Like, is it a hundred extra lines or is it a whole project?
It depends on how careful you want to be. A minimal MQTT firmware for this specific project — two buttons, two LEDs, subscribe to alarm state, publish button presses — is maybe a hundred and fifty lines of C++ in Arduino framework. That sounds manageable. But then you add reconnection handling for when the broker drops, you add Last Will and Testament so Home Assistant knows when the device goes offline, you add debouncing for the buttons, you add a watchdog timer in case the firmware locks up. Suddenly you are at four or five hundred lines and you are maintaining it every time the MQTT library updates. ESPHome handles all of that for you, generated from a YAML file that is maybe thirty lines long.
ESPHome is the other path.
ESPHome is a framework that runs on the ESP32 and integrates with Home Assistant natively, without a broker in the middle. You write a YAML configuration file — not code, just configuration — that describes your hardware. You say "here is a button on GPIO four, here is an LED on GPIO eighteen, here is my Wi-Fi password, here is my Home Assistant server." ESPHome compiles the firmware for you, flashes it to the device, and from that point on Home Assistant discovers it automatically over the local network. No broker, no manual topic management, no reconnection logic to write.
That sounds like ESPHome is just better.
For this specific project, it is. The alarm control panel integration in ESPHome is very clean. There is a built-in alarm control panel component that maps directly to Home Assistant's alarm entity. You define your arm button, your disarm button, your armed LED, your disarmed LED, and the component handles all the state synchronization. If Home Assistant reports the alarm is armed, the red LED lights. If you press disarm, it sends the command and the green LED follows. That bidirectional sync is the thing that makes this feel like a real integrated panel rather than a hacky workaround.
If the alarm arms remotely — say, from the phone — the LED on the panel updates.
Because the ESP32 is subscribed to the alarm state in Home Assistant, any change from any source updates the panel immediately. That is the thing that makes this useful rather than just a novelty. The panel reflects reality, not just what you pressed last.
That distinction is actually pretty important. If the panel only tracked what you pressed locally, it would drift out of sync the first time someone armed from the app. You would walk past a green LED thinking the house is disarmed when it is actually armed.
Which is worse than useless. A panel that gives you wrong information is more dangerous than no panel at all. The bidirectional sync is not a nice-to-have, it is the whole point. ESPHome makes that easy. Rolling your own MQTT solution and getting that sync reliable is hard.
I will admit that is more useful than I initially gave it credit for.
The MQTT path is not wrong. If Daniel already has MQTT infrastructure, or if he wants to do something more custom — multiple alarm partitions, different behavior for night mode versus away mode — MQTT gives him more control. But for a clean first build with two buttons and two LEDs, ESPHome is the shorter road to a working, reliable result.
The panel works. Now it needs to live somewhere. What does Daniel actually mount this in?
This is where people either spend a lot of time or almost none, depending on how they approach it. The simplest option is a project enclosure from AliExpress — search for "ABS project box eighty-six by fifty millimeters" and you will find small rectangular plastic enclosures for about two dollars. Drill four holes — two for buttons, two for LEDs — and you are done. It is not beautiful but it is functional and it looks intentional, which is better than a bare board taped to the wall.
The more considered option?
A single-gang or double-gang electrical wall plate enclosure. There are 3D-printable designs on Printables and Thingiverse specifically sized for ESP32 dev boards with cutouts for twelve-millimeter buttons. If Daniel has access to a printer — or knows someone who does — that is the path to something that looks like it belongs on a wall next to a light switch. Clean, flush, professional. The filament cost is almost nothing.
How much filament are we actually talking for a print like that?
A single-gang wall plate enclosure for an ESP32 is maybe fifteen to twenty grams of filament. At typical PLA prices that is under fifty cents of material. Print time on a modern printer is two to three hours. The design files on Printables are free. So the total cost of the nicest-looking enclosure option is basically your electricity for an afternoon.
If he wants to buy something that already looks like a wall panel without printing?
The Sonoff enclosure ecosystem has some options, and there are generic ABS wall-plate project boxes on AliExpress that fit the aesthetic reasonably well. Search "wall mount project enclosure single gang" — you will find things in the two to five dollar range that have a much lower profile than a generic project box. The key dimension to watch is interior depth. The ESP32 dev board is about fifty-one by twenty-eight millimeters but it sits about twelve to fifteen millimeters tall off the PCB with the headers. You need at least twenty millimeters of interior depth to fit it comfortably.
Let's talk money. What is Daniel actually spending here?
The ESP32 WROOM dev board runs four to six dollars on AliExpress. The Omron B3F-1000 switches, two of them, roughly one to two dollars total. LEDs, a handful from a mixed pack, essentially zero marginal cost — call it fifty cents. Resistors, same story, fifty cents. The enclosure, two to five dollars depending on which route he goes. Wire, a meter of hookup wire, another dollar or two. If he needs a USB power supply to run the ESP32 off the wall, that is another three to five dollars, though he may already have one.
The low end of all that is what, twelve dollars?
Realistically, with shipping factored in and accounting for the fact that AliExpress orders sometimes come in two separate packages that each have a minimum shipping cost, you are looking at twenty-five to forty dollars all in. The higher end of that range is if he goes with the nicer enclosure, buys the Omron switches from Mouser for guaranteed genuine parts, and needs a power supply. The lower end is AliExpress for everything, uses a USB phone charger he already owns.
That is a remarkably small amount of money for something that will be on his wall every day.
That is the DIY case right there. A commercial Zigbee keypad — something like the Centralite keypad or the Xfinity controller that people reflash for Home Assistant — runs forty to eighty dollars and you are limited to whatever interface it ships with. Daniel's version costs a third of that, does exactly what he wants, and if a button breaks in three years he replaces a fifty-cent switch, not the whole unit.
The leaf medicine of home automation. Cheaper and you know exactly what is in it.
I am not touching that comparison but the cost math is accurate.
Daniel has the parts list, he has the wiring diagram in his head, he has ESPHome sorted. Walk him through what actually happens the day the AliExpress packages land.
Right, the practical sequence. First thing before you touch a soldering iron — flash the ESP32. Get ESPHome running on your Home Assistant instance, create a new device, and flash it over USB before it goes anywhere near an enclosure. Confirm it connects to your Wi-Fi, confirm Home Assistant sees it. That way if something is wrong with the board you find out before you have drilled holes in a box.
Flash first, drill never having to wonder if the board is dead.
Step two, build the circuit loose on a breadboard if you have one, or just twist the wires together temporarily. Write your ESPHome YAML — the alarm control panel component, your two binary sensor inputs for the buttons, your two GPIO switch outputs for the LEDs. Flash again over Wi-Fi this time, because ESPHome supports over-the-air updates, and test every interaction. Press arm, watch the red LED. Press disarm, watch the green. Trigger the alarm from the Home Assistant interface on your phone and confirm the panel follows.
You are not soldering anything until you know the software works.
That is the rule. Solder is permanent. Software is free to revise. And I would add — test the edge cases too, not just the happy path. What happens if you press arm when it is already armed? What happens if the Wi-Fi drops and comes back? ESPHome handles reconnection gracefully, but you want to see it with your own eyes before the thing is screwed to the wall.
What does the reconnection look like in practice? Does the LED just freeze on whatever state it was last in?
During a disconnect, yes — the LED holds its last known state. Which is actually the safe behavior. If you armed the house and then the Wi-Fi hiccups, you do not want the panel to suddenly show green and make you think the alarm disarmed. It stays red until it can confirm the current state. When the connection comes back, ESPHome re-subscribes to the Home Assistant state and syncs within a second or two. You might get a brief flicker as it reconciles, but it will land on the correct state.
That is reassuring. Okay, and if the LED is not lighting when he expects it to?
Check your GPIO assignments in the YAML first — that is the most common mismatch. Then check the resistor is actually in series and not accidentally bridging to ground. A cheap multimeter in continuity mode solves that in thirty seconds. The ESPHome logs are also extremely readable. Home Assistant shows you a live log stream from the device, and it will tell you exactly what state it thinks the alarm is in and what the panel is reporting back.
That is a accessible project. I said it and I mean it.
Once it is on the wall it is just part of the house. That is the part that does not show up in the parts list — the satisfaction of walking past something every day that you built yourself and that actually works.
Daniel is going to press that arm button for the first time and feel unreasonably proud of a fifty-cent switch. I understand this completely.
Where I want to leave this, though, is with what comes next. Because this panel as described is a solid version one. Two buttons, two LEDs, done. But the architecture is open-ended in a way that a commercial keypad is not. You could add a passive infrared sensor to the enclosure and have the panel itself act as a motion zone. You could add a piezo buzzer that chirps when the alarm arms. A small seven-segment display showing a countdown timer for the exit delay. All of that is additional GPIO lines and a few more lines of ESPHome YAML.
None of which requires buying a new panel.
That is the point. The ESP32 has more than enough GPIO headroom to grow into. The enclosure is the limiting factor, and enclosures are cheap.
The piezo buzzer idea is actually interesting to me because that is one of the things commercial keypads do that is useful — the entry delay countdown beep. You walk in, it starts beeping, you have thirty seconds to disarm. Without that audio cue you are relying entirely on remembering to check the panel.
The piezo version of that is maybe three dollars of hardware and ten lines of ESPHome YAML using the RTTTL or tone component. You define a beep pattern, you trigger it when the alarm enters the pending state, and it counts down. That is a meaningful usability improvement over version one and it is entirely within the scope of what Daniel has already built. The foundation supports it.
The broader thing here, and I think this is worth saying plainly, is that physical interfaces are not going away in smart homes. They are coming back. The full-app-for-everything model has a real usability ceiling, and the people building home automation systems are starting to hit it. A button on the wall that does one thing reliably is sometimes just the right answer.
And building your own means you decide what that one thing is.
Daniel, total cost somewhere between twenty-five and forty dollars. Go build it, send us a picture when it is on the wall, and thank Hilbert Flumingtop for keeping this whole operation running.
This episode's compute courtesy of Modal — serverless GPU infrastructure that makes the pipeline that generates this show actually possible.
This has been My Weird Prompts. If you have enjoyed the show, a review wherever you listen goes a long way. We will see you next time.

")