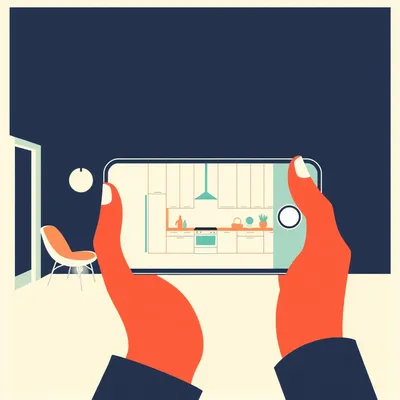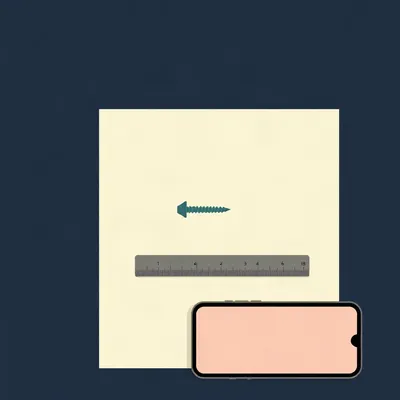
Daniel's been moving apartments again, and he's back on the question of whether he can replace a photo album of two hundred pictures with one digital clone of a room. The tool is Polycam, and the wrinkle is that his phone doesn't have LiDAR. So everything has to come from plain images. He wants to know which capture mode to use, video or automatic, whether to go with photogrammetry or Gaussian splat, whether object masking helps or hurts, how to capture the vertical detail without creating conflicts the software can't resolve, and whether a bright ruler on the floor actually does anything useful. That last one is the part I keep circling. He's asking if a known object in the scene helps the software anchor scale.
It does, but not the way most people assume. The ruler isn't giving the reconstruction engine a reference during capture. Polycam builds the model first, and then you set scale afterward using any known distance in the scene. The ruler is just a convenient known distance that's already in the model. A door works just as well.
So the bright ruler is a crutch for the human, not the software.
In most cases, yes. But there's a subtlety. If you want the model to come out scaled correctly without any post-processing, having a known object in the scene can help you check whether the reconstruction drifted. But the actual scaling step happens after the fact.
Let's start with what the app is actually doing when you hit record.
Polycam is a photogrammetry and Gaussian splatting pipeline wrapped in a consumer interface. Photogrammetry takes a bunch of two-dimensional images, finds matching features across them, and triangulates those features in three-dimensional space. Gaussian splatting is a different approach entirely. It builds a radiance field, essentially a cloud of fuzzy three-dimensional points that each carry color and opacity information. The result is visually richer, but the geometry isn't a clean mesh you can measure.
And the LiDAR distinction matters because LiDAR phones get depth directly. Without LiDAR, the software has to infer depth from parallax. That changes what good capture means. You're not feeding a depth sensor. You're feeding an inference engine that's trying to triangulate features from overlapping images.
Right. On a LiDAR phone, you can walk around a room and the sensor is constantly measuring distance. Without LiDAR, the software only knows where a point is if it appears in at least two images from different positions. That's the fundamental constraint. Every surface in the room needs to be seen from at least two angles, ideally more, and those angles need to be far enough apart that the parallax is meaningful.
And indoor spaces are the hard case. Walls are mostly blank. Tiles repeat. Windows reflect. The floor is a uniform field of wood or stone. And the vertical dimension is the worst part. If you pivot around your torso at chest height, you capture a band of the room. The ceiling and floor are barely in frame, and the upper cabinets are cut off entirely.
The software needs overlapping features across the vertical axis to resolve the room's height and the relationship between floor and ceiling. If you only capture a horizontal band, the reconstruction has no way to know how far the floor is from the ceiling. It might produce a model that looks right from the middle but is completely wrong at the top and bottom.
So the capture protocol has to solve for that. Let's get into the modes first, because that's the first decision Daniel faces.
Video mode captures a continuous stream and extracts frames from it. Automatic mode triggers frames based on detected transitions. The tradeoff is that video mode gives you more frames but more redundancy, and if you're moving, some of those frames will have motion blur. Automatic mode is more selective, but if you're panning slowly across a blank wall, it might not detect enough transitions and you'll end up with gaps.
So for a room scan, which one wins?
For indoor spaces, I'd lean toward video mode with slow, deliberate movement. The reason is that rooms have long stretches of low-texture surface. A blank wall doesn't trigger a transition detector very well. If you're in automatic mode and panning across a white wall, the app might take three frames for the entire wall. That's not enough parallax. Video mode, even with redundancy, guarantees that you're getting frames at regular intervals, and the software can discard the blurry ones.
But the blur is the problem. If you're moving too fast, every frame is slightly smeared, and the feature matching fails.
That's the tension. Video mode rewards slow movement. If you pan too quickly, you get motion blur and the reconstruction breaks. Automatic mode is more forgiving of movement because it only captures when the scene is stable, but it might under-sample. So the practical advice is: if you're patient and can move slowly, use video mode. If you're in a hurry, automatic mode will give you a cleaner but sparser capture.
And then there's the photogrammetry versus Gaussian splat question.
This is where the use case matters. Daniel wants a digital clone for spatial memory. He wants to stand in IKEA and check whether a shelf fits in a cranny. That's a measurement problem. Photogrammetry produces a mesh with actual geometry. You can export it, open it in a CAD tool, measure distances between vertices. Gaussian splat produces a radiance field. It looks stunning, handles reflections and translucency better, but the geometry is implicit. You can't easily measure a splat.
So for this use case, photogrammetry wins.
For measurement, yes. But there's a case for capturing both. Run the photogrammetry pass for the geometry, then run a Gaussian splat pass for the visual record. The splat gives you a walkthrough that feels like being in the room. The mesh gives you the numbers.
That's the dream workflow, but it doubles the capture time.
It does. And if you're scanning an entire apartment, that's a real cost. For most people, I'd say photogrammetry alone is sufficient. The mesh is good enough to answer the IKEA cranny question, and you can always take a few regular photos for the visual details.
Object masking. Daniel mentioned the toggle. What does it actually do?
Masking isolates the subject from the background. It's useful when you're scanning a single object, say a chair or a vase, and you want to remove the table it's sitting on. But in a room scan, the subject is the room itself. If you turn masking on, the algorithm might misclassify a wall or the floor as background and remove it. Or it might decide that the brightest thing in the frame is the subject and mask everything else.
So for rooms, leave it off.
Almost always. The only exception would be if you're scanning a room and there's a specific object in it that you want to isolate, but that's a different use case. For a full room clone, masking is a liability.
Now the vertical problem. Daniel's specific question was whether to do a horizontal pan and then a vertical pan. Let's talk about why that's even a question.
The software reconstructs three-dimensional structure from parallax. Horizontal parallax comes from moving around the room. Vertical parallax comes from changing the height of the camera. If you only pan horizontally at one height, you get great horizontal parallax for the band at that height, but almost no vertical parallax. The floor and ceiling are only seen from one vertical angle, which means the software can't triangulate their position relative to the rest of the room.
So a single horizontal pan produces a model that's accurate in the middle band and increasingly unreliable as you move toward the floor and ceiling.
The fix is to add vertical parallax. The simplest way is to do two horizontal pans at different heights. One standing, one crouched. That gives the software two different vertical angles on every surface, which is enough to resolve the vertical dimension.
And a vertical pan from a fixed position?
A vertical pan, tilting the camera up and down from a fixed point, gives you vertical parallax but no horizontal parallax. It's useful for capturing detail on a single wall, but it doesn't help the software understand the room as a whole. The better protocol is to combine both. Start with a horizontal pan at standing height, then do a second horizontal pan at a lower height, maybe crouched or holding the phone near the floor. Then, if there are high-detail areas, like upper cabinets or a complicated ceiling, do a slow vertical pan across those specific areas.
But here's the conflict problem Daniel mentioned. If you capture the same wall from multiple angles with inconsistent lighting or motion blur, the software might fail to match features and produce a broken mesh or a double wall.
That's the real risk. The goal is maximum coverage with consistent, overlapping, well-lit frames. Not just more frames. If you do a horizontal pan and then a vertical pan that overlaps heavily with the horizontal pan, the software has to reconcile two very different sets of images. If the lighting changed between the two pans, or if the vertical pan has blur, the feature matching can fail. The result is a model where the wall appears twice, slightly offset.
So the protocol has to be designed to minimize conflicts while maximizing coverage. What does that look like in practice?
First, keep the lighting constant. If you're scanning a room with windows, close the blinds or do the scan at a time of day when the light is stable. Second, move slowly enough that every frame is sharp. Third, overlap your pans deliberately. When you finish the standing horizontal pan, start the crouched pan from the same position and follow the same path. Fourth, avoid going back over an area you've already captured unless you're doing it from a significantly different angle.
The kitchen scenario. Torso-height pan misses upper cabinets and floor clearance. A second lower pan captures under-counter detail. But if you do the lower pan and then go back and do a vertical pan on the upper cabinets, you've now got three passes over the same wall. Is that too much?
It depends on the software's tolerance. Polycam is fairly robust, but every additional pass increases the chance of conflict. The safer approach is to plan the passes in advance. Standing pan covers the middle band and the upper cabinets if you angle the phone slightly upward. Crouched pan covers the lower band and the floor. If the upper cabinets still aren't captured well, do a targeted vertical pan on just that section, and keep it slow and steady.
What about a room with a large window? Daniel mentioned that reflective surfaces cause photogrammetry to fail.
Windows are the classic failure case. The reflection changes as you move, which means the features on the glass don't stay consistent between frames. Photogrammetry can't triangulate a moving reflection. Gaussian splat handles it better because it's modeling the radiance field, not the geometry. The splat can represent the reflection as a fuzzy blob of light that looks right even if it's not geometrically accurate.
So for a room with a big window, the photogrammetry mesh will have a hole or a distorted surface where the window is, but the Gaussian splat will look fine.
Right. And if you need measurements, you can measure around the window. The wall dimensions are still there. The window itself is just a gap.
Let's move to the reference object question, because that's where Daniel's intuition is actually pretty good, but the execution matters.
High-end LiDAR systems use known-geometry objects for calibration. Spheres, checkerboards, ArUco markers. The software knows the exact dimensions of these objects, so when it sees one in the scan, it can derive absolute scale. Polycam doesn't work that way. It doesn't look for a ruler in the scene and use it during reconstruction. Instead, it has a Rescale Tool that lets you set scale after capture by picking two points and entering a known distance.
So the workflow is: scan the room without any reference object, then open the Rescale Tool, pick two points that you know are a meter apart, and tell the app that distance. The entire model scales to match.
And that means you don't need a reference object in the scene at all. You can use any known dimension. A standard interior door is about eighty centimeters wide in Europe, thirty to thirty-six inches in the US. Almost every room has a door. Pick the two edges of the door frame, enter eighty centimeters, and the whole model is scaled.
So the bright ruler is redundant if you have a door.
For scaling, yes. But there's a case for the ruler. If you want to check the scale in multiple places, or if you're scanning a space without doors, like an open-plan loft, a ruler on the floor gives you a known distance that's visible from multiple angles. The key is placement. If you put the ruler on a wall, it's only visible from one side. If you put it on the floor in the center of the room, it's visible from every angle, and it's geometrically simple.
And it's high contrast. A bright yellow ruler on a dark wood floor is easy for the software to see, which means the feature matching on the ruler itself is reliable.
Right. The ruler becomes a stable feature that the software can use to tie frames together. It's not that the software knows the ruler is a ruler. It's that the ruler provides a consistent set of high-contrast features that appear in many frames from different angles. That helps the reconstruction, even before you use it for scaling.
But there's a tradeoff. If you put a ruler in every room, you have to remember to remove it from the final model if you want a clean clone. Or you accept that every room has a bright yellow stick on the floor.
That's the friction. For a whole apartment scan, placing a ruler in each room and then remembering to pick it up before you leave is a hassle. And if you forget, the model has a ruler in it. The alternative is to skip the ruler entirely and rescale afterward using a known dimension. The door is the obvious choice. It's already in the room, it's a standard size, and it appears in almost every scan.
But here's the thing. The door width is a known dimension, but it's not always exact. Older buildings have non-standard doors. A door might be seventy-eight centimeters instead of eighty. If you enter eighty, the model is slightly off.
That's true. And that's where the ruler has an advantage. A ruler is exactly the length it says it is. Thirty centimeters is thirty centimeters. If you want millimetric precision, the ruler is better than a door. But for the IKEA cranny use case, you don't need millimetric precision. You need relative proportions. Will the shelf fit in the alcove? If the model is off by two percent, the answer is still yes or no in almost every case.
So the ruler is about precision, and the door is about convenience. Daniel's real question is whether the ruler is worth the trouble.
My answer is: for a single room, yes, if you care about precision. For a whole apartment, no. Use the door. Or use a tile if you know the tile size. Or measure one thing with a tape measure when you're in the room and use that.
The floorplan angle. Polycam can generate a floorplan from a scan, but the floorplan's scale depends on the scan's internal scale. If the scan is unscaled, the floorplan is unscaled. The Rescale Tool is the bridge.
Right. The floorplan is just a projection of the model's geometry onto a two-dimensional plane. If the model thinks the room is fifty arbitrary units wide, the floorplan will say fifty units. Once you rescale the model, the floorplan inherits the correct scale. So the workflow is: scan, rescale using any known distance, then generate the floorplan.
And that floorplan is actually useful for the moving problem. You can measure distances on the floorplan without going back to the apartment.
Daniel's use case is standing in IKEA and wondering whether a particular cabinet fits in a particular cranny. If he has a scaled floorplan of the apartment, he can measure the cranny on his phone and compare it to the IKEA dimensions. That's the whole point.
Which brings us to the practical question. What does a good capture protocol actually look like, step by step?
First, prep the room. Close blinds, turn on lights, remove anything that moves, like pets or people. Second, choose video mode and photogrammetry. Leave object masking off. Third, start at one corner of the room. Hold the phone at standing height, angled slightly upward so the upper cabinets are in frame. Pan slowly around the room, keeping the phone steady. Fourth, when you return to the starting point, crouch down and do a second pan at knee height, angled slightly downward to capture the floor. Fifth, if there are high-detail areas, do a targeted vertical pan on those sections. Sixth, stop the capture and review the model. If there are holes or distortions, do a supplemental capture of just that area.
And the reference object, if you're using one, goes on the floor in the center of the room before you start.
Yes. Bright, geometrically simple, visible from all angles. A yellow ruler is perfect. Put it in the center of the floor, not against a wall. Then do the pans. The ruler will appear in almost every frame, which helps the reconstruction, and you'll have a known distance for rescaling afterward.
What about the conflict problem? If you do a standing pan and a crouched pan, you're capturing the same walls from two different heights. How does the software reconcile that?
The key is overlap. The two pans need to share enough features that the software can match them. If the standing pan captures the middle of the wall and the crouched pan captures the lower part, the overlap is in the middle band. As long as that band has enough texture, the software can stitch the two pans together. If the wall is completely blank, the overlap has no features, and the software might fail to connect the two passes.
So blank walls are the enemy.
Blank walls, uniform floors, repeating tile patterns. Anything without distinctive features. The software needs corners, edges, contrast. A bright ruler on the floor helps with the floor. A piece of furniture helps with the walls. If you're scanning an empty apartment with white walls and a beige carpet, the reconstruction is going to struggle no matter what you do.
The protocol matters, but the room itself is a variable. A cluttered room scans better than an empty one.
Ironically, yes. The mess provides features. A chair, a lamp, a pile of books. These are the anchor points the software uses to triangulate. An empty room is the hardest case.
So Daniel's moving workflow, scanning an apartment before the furniture arrives, is actually the hardest possible scenario.
It is. And that's worth naming. If you're scanning an empty apartment, you need to be extra careful with the protocol. Move slowly, overlap deliberately, and consider placing a few temporary objects in the room to provide features. A chair in the corner, a box on the floor. Anything with texture and contrast.
Or the bright ruler. It's doing double duty. Scale reference and feature anchor.
Right. The ruler earns its place in an empty room. In a furnished room, the furniture already provides features, and the ruler is just about scale.
Let's talk about the Gaussian splat option one more time, because I think there's a case for it in the digital clone use case that we haven't fully explored.
The splat is better for the visual record. If you want to walk through the apartment in AR and feel like you're there, the splat is the better experience. It handles reflections, translucency, and lighting in a way that photogrammetry can't. The mesh looks like a video game from ten years ago. The splat looks like a photograph.
So the ideal workflow might be: photogrammetry for measurement, splat for the walkthrough.
And Polycam supports both. The question is whether the capture protocol differs. For a splat, you want the same slow pans, but you might want to capture more of the lighting variation. The splat is modeling the light field, so it benefits from seeing the room from many angles with different reflections. The photogrammetry mesh wants consistent lighting to avoid conflicts.
That's a subtle point. The same capture that's optimal for photogrammetry might be suboptimal for splat, and vice versa.
It might be. I'm not sure anyone has done a rigorous comparison. But the intuition is that photogrammetry wants stable, diffuse lighting, while splat can handle more variation because it's modeling the light itself.
So if Daniel wants both, he might need to do two captures. One with the blinds closed for the mesh, one with natural light for the splat.
That's the thorough approach. Whether it's worth the time depends on how much he values the walkthrough experience. For the IKEA cranny problem, the mesh is enough.
Let's get back to the reference object question, because I want to pin down the answer. Daniel asked specifically whether a bright ruler is worth placing in every room.
The answer is: it depends on what you're optimizing for. If you want the simplest workflow, skip the ruler and rescale afterward using a door or a tile. If you want the most reliable reconstruction, especially in empty rooms, the ruler helps as a feature anchor. If you want millimetric precision, the ruler is better than a door because its size is exact.
And the placement is always the same. Center of the floor, visible from all angles, not against a wall.
Yes. The floor is the only surface that's visible from every position in the room. A ruler on the floor is seen from every angle of every pan. A ruler on a wall is only seen from one side.
What about a ruler on a table? That seems like it would be visible from most angles.
It would, but the table might be in the frame for only part of the pan, and the table's surface is at a different height than the floor. The floor is the most consistent surface in the room. Put it there.
And the color matters. Bright yellow, high contrast against the floor.
Right. The software doesn't care that it's a ruler. It cares that it's a set of high-contrast features that appear consistently across frames. A bright yellow object on a dark floor is ideal.
So Daniel's instinct was correct. The ruler is useful. But not for the reason he might have thought.
It's not a calibration target in the LiDAR sense. Polycam doesn't recognize it as a known object. It's just a convenient, high-contrast, known-dimension feature that helps the reconstruction and gives you a post-hoc scale reference.
The door does the same job with zero setup.
With slightly less precision. But for the IKEA problem, precision isn't the bottleneck. The bottleneck is having any scale at all. Once the model is scaled to within a few percent, you can answer the fit question.
Let's talk about the floorplan one more time, because I think that's the actual deliverable Daniel wants.
The floorplan is the most useful output for the moving problem. A scaled floorplan lets you measure any distance in the apartment without being there. You can check the width of a hallway, the depth of a closet, the clearance under a counter. All from the floorplan.
The workflow is: scan, rescale, generate floorplan. In that order.
Yes. If you generate the floorplan before rescaling, you get an unscaled floorplan, and you have to start over. The Rescale Tool is the bridge.
What if the scan has holes? Does the floorplan still work?
It depends on where the holes are. If the scan missed a corner of the room, the floorplan will have a gap there. The floorplan is only as good as the underlying geometry. That's why the capture protocol matters. A complete scan produces a complete floorplan.
The whole thing hangs together. Capture protocol, reconstruction quality, scale, floorplan. Each step depends on the previous one.
The reference object is a small part of the first step. It helps, but it's not the linchpin. The linchpin is the capture protocol. Slow, overlapping, multi-height pans.
Let's hit the misconceptions before we wrap. The big one is that you need LiDAR to get useful scans.
False. Polycam's photogrammetry and Gaussian splat work on any phone with a decent camera. LiDAR makes it easier, but it's not required.
The second one is that more frames always means a better scan.
Also false. Redundant or blurry frames create conflicts. The goal is consistent, overlapping coverage, not raw frame count.
The third is that you need a reference object in the scene for scale.
False. The Rescale Tool lets you set scale after capture using any known distance. A door, a tile, a piece of furniture. The ruler is optional.
The three misconceptions are all about overcomplicating. You don't need LiDAR, you don't need maximum frames, and you don't need a reference object. You need a careful capture protocol and one known distance.
That's the episode in three sentences.
Hilbert, you've been quiet.
Hilbert: Stanley PowerLock. Twenty-five feet. Bright yellow.
What?
Hilbert: The tape measure. I still have it. It's in the toolbox under the sink. I used it for a job in the mid eighties. Set dresser for a home renovation show. Low budget. We had to pre-scan rooms for the art department. Polaroid camera and a tape measure. That was the whole kit.
Pre-scan with a Polaroid?
Hilbert: You'd take four or five shots of each room, tape them to a board, write the measurements on the back. The art department would look at the board and decide what furniture to bring. It worked, mostly. The trick was the tape measure. I'd extend it to exactly one meter, put it in the center of the floor, and take one shot from the doorway. That gave them scale in every room.
You were doing the bright ruler thing before Polycam existed.
Hilbert: The ruler is just a tape measure that doesn't retract. Same principle. But the real trick wasn't the tape measure. It was putting it in the same spot every time. Center of the floor, extended to one meter, shot from the doorway. Every room, every house. That way the art department could compare rooms at a glance. They knew that if the tape measure looked this big in the photo, the room was this size.
The consistency of placement mattered more than the object itself.
Hilbert: We did a house once where I put the tape measure on a rug in one room and bare floor in another. The producers made me re-shoot the whole place. They said the scale drift made the living room look smaller than the kitchen. It was the rug. The tape measure sat lower on the rug, so it looked different in the photo. I never forgave that rug.
The lesson is: same object, same position, every room.
Hilbert: That's what I'd tell your Daniel. If he's going to use a ruler, he should use the same ruler, put it in the same spot, every room. Center of the floor. That way the models are comparable. If he puts it in a different spot every time, he might as well not bother.
That's actually a good point. The reference object isn't just about scale. It's about consistency across scans. If you're scanning multiple rooms, using the same object in the same position gives you a consistent anchor.
Hilbert: The tape measure worked because it was always the same tape measure. Same yellow. Same length. Same spot. If I'd used a different tape measure in every room, the art department would have had to recalibrate every time.
The protocol extends beyond a single room. It's about the whole apartment.
Hilbert: That's what I'm saying. One object, one position, every room. Then the models all line up.
The Rescale Tool handles the actual scaling. The ruler is just the consistent anchor.
Hilbert: I don't know about the app. I'm just telling you what worked with a Polaroid.
That's the thing, though. The principle is the same. Consistency beats precision.
Hilbert: The tape measure was precise. Twenty-five feet, Stanley. But the consistency was what made it useful.
Now I'm wondering whether the capture protocol matters more than the post-processing. If the scan is consistent, the rescaling is trivial. If the scan is inconsistent, no amount of post-processing fixes it.
That's the open question. How much of the final quality is determined by the capture, and how much by the post-processing?
I think it's mostly capture. The software can't recover information that wasn't captured. If the vertical detail is missing, no amount of rescaling brings it back.
The protocol is the product.
In this case, yes.
Which means Daniel's instinct to think carefully about the pans was right. The geometry of capture is the whole game.
The software is just the assembly line. The capture is the raw material.
The reference object is a small but real part of the raw material.
A consistent anchor. Not a magic bullet.
Let's leave it there. The misconception to name: people think you need LiDAR, maximum frames, and a reference object. You need none of those. You need slow, overlapping, multi-height pans and one known distance.
If you're scanning an empty apartment, bring a chair. The mess is your friend.
The open question is whether Gaussian splatting will eventually produce geometry reliable enough to skip photogrammetry entirely. Right now, the splat is a painting and the mesh is a model. For measurement, you want the model. But that might change.
If it does, the capture protocol might change with it. The splat wants light variation, the mesh wants stability. If the splat becomes the default, the protocol flips.
Something to watch. If you've used Polycam or a similar app for room scanning, we'd love to hear your workflow. Especially if you've found a better reference object than a ruler.
A tape measure, apparently.
Thanks to our producer, Hilbert Flumingtop.
This has been My Weird Prompts, the human-AI collaboration podcast.
Email us at show at my weird prompts dot com.
We'll be back soon.