Daniel sent us this one — he's got a Nebula projector, had it mounted on the headboard using a camera-gear attachment. Worked fine until his son Ezra decided the projector was the most interesting object in the room and pulled it down. So now he's asking about mounting options: the permanent ceiling mounts for people who can drill holes, renter-friendly alternatives that won't lose you your deposit, and what makes any of these actually child-safe. He also wants to know about pull-down projection screens — whether they're worth it for image quality, and how you even mount those things.

This is the kind of question that seems simple until you actually start looking at the options. There are about four major categories of ceiling mount, and they solve very different problems.
Of course there are.
You've got your fixed low-profile mounts, which sit as close to the ceiling as possible — maybe four to six inches of drop. Then adjustable-height mounts with telescoping columns, which can extend anywhere from about nine inches to over three feet. There are universal mounts with sliding arms that fit basically any projector under fifteen pounds or so. And then projector-specific mounts, which are precision-machined to match the exact bolt pattern of one model.
The universal ones are the adjustable wrench, and the model-specific ones are the socket that fits exactly and doesn't strip the bolt.
That's exactly the right analogy. The universal mounts use claw-like arms that slide outward and grip the projector's mounting holes. They work, but they can drift over time — especially with vibration from foot traffic above or if someone slams a door. A model-specific mount like the Peerless PRG or Chief RPMA series has a dedicated plate that matches your projector's bolt pattern exactly. Once it's locked in, it's not going anywhere.
For Daniel's situation — small Nebula projector, presumably lightweight — a universal mount would probably be fine, but is there a scenario where it becomes not fine?
The scenario is the one he just lived through. A curious toddler. Universal mounts work on friction and tension. If a child grabs the projector and pulls, those sliding arms can shift. Maybe not immediately, but over repeated tugs, the grip loosens. A model-specific plate doesn't have that failure mode because there's nothing to slide.
That's actually the through-line of this whole conversation: every mounting decision changes when you add a small human who treats your home theater like an archaeology dig.
That's before we even get to cable management, which is where childproofing gets serious. A dangling HDMI cable is basically a toddler invitation. They see it, they pull it, the projector comes down, and you're out whatever you spent.
Let's talk permanent mounts first. Someone owns their place, they can drill into ceiling joists, what are they looking at?
The gold standard is a three-part system. First, find a ceiling joist — not drywall anchors, not toggle bolts, an actual structural joist. Most mounts come with lag bolts that need to bite into at least an inch and a half of solid wood. Second, the mount itself should be rated for at least four times the weight of your projector. A Nebula Capsule weighs about one and a half pounds, so even a ten-pound-rated mount gives you plenty of overhead. Third, you need a way to get cables to the projector that doesn't involve them hanging in free air.
That third part is where most installations fall apart aesthetically.
You see these otherwise nice setups with a power cable snaking down the wall and it ruins the whole effect. The proper way is to run cables through the ceiling — which means cutting holes, fishing wire, possibly installing a recessed outlet near the mount. It's not technically difficult but it is dusty and annoying.
The dust is the hidden cost of every home improvement project. Nobody budgets for the dust.
There's also the question of what kind of ceiling you have. Standard drywall over joists is straightforward. But if you've got a concrete ceiling — common in apartment buildings, especially in Jerusalem where Daniel is — you're looking at a completely different installation. You need a hammer drill, concrete anchors, and a lot more patience. Some mounts come with concrete anchor kits, but most don't.
For a concrete ceiling, you're basically committing to a Saturday of noise complaints from the neighbors.
And you want to be absolutely sure about projector placement before you drill into concrete. There's no patching that easily.
Which brings us to the measurement part. How do you figure out where the mount actually goes?
This is where people mess up most often. Every projector has a throw ratio — the distance from the lens to the screen divided by the screen width. A throw ratio of one point five means that to get a hundred-inch-wide image, you need the lens one hundred fifty inches from the screen. You need to know your projector's throw ratio and your desired screen size before you drill a single hole.
The Nebula projectors are typically short-throw, right?
Most of the portable Nebulas are around one point two to one point three throw ratio. So for an eighty-inch image — about what you'd want in a bedroom — you're looking at roughly eight to nine feet from lens to wall. But the mount position isn't just about distance. It's also about vertical offset. Most projectors are designed to sit either exactly at the top edge of the screen or slightly above it. If you mount too high, you're using keystone correction to fix the image, and keystone correction degrades image quality.
Explain keystone correction for people who've heard the term but don't know what it actually costs you.
When a projector isn't perfectly perpendicular to the screen, the image becomes trapezoidal — wider at the top or bottom. Keystone correction digitally warps the image to make it rectangular again. The problem is, you're not using the full resolution of the projector anymore. Those corrected pixels are being compressed or stretched. You lose sharpness, you lose brightness in the corrected areas, and you introduce artifacts. With a ten-eighty-p projector, you might effectively be watching at closer to seven-twenty-p after aggressive keystone correction.
Mounting height isn't just aesthetic. It's a resolution tax.
And this is where a mount with fine vertical adjustment becomes worth the money. The cheap fixed mounts — the twenty-dollar ones on Amazon — they work, but you get one shot at the right height. If you're off by an inch, you're either shimming the mount or living with keystone correction. A good adjustable mount lets you dial in the height after installation. Chief and Peerless both make mounts with a half-inch of fine vertical adjustment, which doesn't sound like much but makes all the difference.
Half an inch of grace. The projector equivalent of a tailor taking in a suit jacket.
Let me address something that comes up a lot: motorized mounts. These have motorized drop mechanisms — you press a button and the projector descends from the ceiling. They're expensive, they're complex, and unless you have a very specific architectural reason for hiding the projector when it's not in use, they're not worth it. More moving parts means more things that can fail.
The motorized mount is the pop-up headlight of home theater.
I'm going to pretend I understand that reference.
Cars in the eighties and nineties had headlights that mechanically rotated up when you turned them on. Looked cool, broke constantly, expensive to fix.
So permanent ceiling mounts: solid, reliable, the right way to do it if you own the place and can drill. But Daniel's a renter, and that changes everything.
Let's talk renter options. He had a headboard mount. What else is out there?
The renter-friendly projector mount market has actually gotten interesting in the last few years. You've got basically five categories. First, tripod stands — the simplest option, but they take up floor space and the legs are a tripping hazard. Second, shelf mounts — literally putting the projector on a high shelf on the opposite wall. Third, tension-rod mounts that go floor-to-ceiling with a projector platform. Fourth, clamp mounts that attach to existing furniture. And fifth, the category Daniel was in: camera-gear adapters that repurpose tripod heads, magic arms, and super clamps.
The shelf approach seems almost too obvious. What's the catch?
The catch is that most projectors vent heat from the front or side, and if you put them on a shelf flush against the wall, you can block the exhaust. Projectors get hot — even LED projectors like the Nebula. Blocked ventilation shortens lamp life or can cause the unit to thermal-throttle or shut down. A shelf mount works, but you need at least six inches of clearance on all sides.
The shelf needs to be deeper than the projector by a meaningful margin. That rules out those narrow floating shelves people use for picture frames.
And the shelf needs to be absolutely level, because even a slight tilt means keystone correction. Shelves mounted with drywall anchors are rated for sheer weight — weight pulling straight down — but a projector sitting on a shelf isn't pulling straight down on the anchors in the same way. Over time, vibration can loosen things.
What about the tension-rod approach? That sounds like a shower curtain rod that got ambitions.
That's basically what it is, just rated for more weight and with a mounting plate. These are floor-to-ceiling poles that use spring tension or a screw mechanism to press against the floor and ceiling. The projector mounts to a plate that slides along the pole. The advantage is zero holes in walls or ceilings. The disadvantage is that the pole itself is visible, and you've got a vertical line running through your room. Some people paint them to match the wall, which helps. The other disadvantage is that tension rods can lose tension over time, especially if the ceiling or floor has any give. You need to check them periodically.
It's a set-it-and-mostly-forget-it-but-check-it-every-few-months solution.
In a household with a toddler, you're checking it weekly. Which brings us to childproofing. Let me be direct: any floor-standing solution with a toddler in the house is a calculated risk. Tripod stands can be pulled over. Tension rods can be shaken. Even a heavy shelf — if a child climbs up to it, and children are remarkably creative climbers — the whole thing can come down.
The child is the ultimate stress test for any mounting solution. They're like tiny, adorable QA engineers.
That's disturbingly accurate. So for child safety, the hierarchy goes like this. Best: ceiling mount into joists, cables fully concealed in the ceiling. Second best: high shelf mounted into studs with cables secured along the wall in paintable raceways. Third best: tension rod system with the projector high enough that a child can't reach it even standing on furniture. Acceptable but requires vigilance: clamp mounts on tall furniture. Not recommended with small children: tripod stands, low shelves, headboard mounts.
Daniel's headboard mount fell into that last category, and it failed exactly as predicted.
To his credit, he recognized the risk and removed it. That's good parenting.
Let me ask about the camera-gear approach more broadly. He used an attachment piece he already had. Is that a viable category for other renters, or was he just making do with what was available?
It's viable with caveats. Camera gear is designed for quick setup and breakdown, not permanent installation. A super clamp attached to a headboard or a shelf can hold a lightweight projector securely — these clamps are rated for much heavier camera equipment. The Manfrotto super clamp, for example, is rated for fifteen kilograms, about thirty-three pounds. A Nebula Capsule is under two pounds. The clamp isn't the weak point.
The attachment point. A headboard isn't designed as a structural mounting surface. It's designed to look good and not fall apart when you lean against it. When a child pulls on a projector mounted to a headboard, the clamp holds, the projector holds, but the headboard itself might give way, or the clamp might rotate on the smooth surface. Also, the ball head or magic arm introduces a pivot point — and children are excellent at discovering pivot points.
Children as intuitive mechanical engineers. They don't know torque as a concept, but they understand leverage in their bones.
They really do. So the camera-gear approach can work in a child-free household, or mounted somewhere completely inaccessible. Top of a tall bookshelf, for instance, clamped to the back edge where little hands can't reach. But once a child can climb, all bets are off.
Alright, let's shift to screens. Daniel specifically asked about pull-down projection screens — what they do for image quality and how you mount them.
This is where I get excited, because the screen is the most underrated component in a projection setup. People will spend a thousand dollars on a projector and project onto a beige wall.
The musical equivalent of plugging a thousand-dollar guitar into a ten-dollar amp.
A proper projection screen does several things. First, it gives you a perfectly flat, uniformly colored surface. Walls have texture — even smooth-looking drywall has microscopic irregularities that scatter light. Second, a screen has gain — a measure of how much light it reflects compared to a standard white reference surface. A gain of one point three reflects thirty percent more light back toward the viewer. Third, screens can reject ambient light. Some are designed to only reflect light coming from the projector's angle while absorbing light from other directions.
A screen isn't just a white rectangle. It's an optical component.
It's absolutely an optical component. And pull-down screens are the most practical option for most people because they disappear when not in use. Fixed-frame screens look better — perfectly tensioned, no waves or curls — but they permanently occupy a wall. If you're in a living room that doubles as a home theater, a pull-down screen is the way to go.
What are the mounting options for pull-down screens? Same categories as projectors?
Similar, but with some important differences. Pull-down screens are heavier than projectors. A hundred-inch pull-down screen can weigh fifteen to twenty pounds. And the weight is concentrated in the housing — the metal case at the top that contains the rolled screen and the spring mechanism. So you're mounting a long, heavy object that's going to be pulled down regularly. The mounting needs to be more robust.
Wall-mounted into studs is ideal, but renters are back to the same problem.
For permanent installation, you mount the screen's brackets into wall studs or ceiling joists. Most pull-down screens come with L-brackets or eye-bolts that can be configured for wall or ceiling mounting. The key is that both brackets need to hit studs, and they need to be level with each other. If one bracket is even a quarter-inch higher than the other, the screen won't roll evenly and you'll get waves in the material.
A quarter-inch tolerance. Even less forgiving than the projector mount.
And unlike a projector mount, you can't use a universal bracket adapter. The screen's mounting points are fixed — they're built into the housing. If your studs don't line up with those points, you either open up the wall to add blocking between studs, or you use a mounting board.
What's a mounting board?
It's the workaround. You take a piece of finished wood — something attractive, maybe painted to match the wall — and you mount that board horizontally across two or three studs. Then you mount the screen to the board. The board spans whatever distance you need. It's not as clean as a direct mount, but it's solid and it lets you position the screen exactly where you want it regardless of stud spacing.
For renters who can't drill into walls at all?
This is the hard part. A pull-down screen is genuinely difficult to mount without wall anchors. They're too heavy for command strips — don't even think about it. There are a few options, none of them perfect. One: a floor-standing pull-up screen. These have a similar mechanism but the housing sits on the floor and the screen pulls up. They're stable but they take up floor space and the housing is a trip hazard. Two: a tensioned floor screen on a stand, basically a portable screen on legs. Three: if you have exposed beams or a drop ceiling with accessible structure above, you can use beam clamps to hang the screen without drilling into walls.
A drop ceiling? Like office ceiling tiles?
If you've got a suspended ceiling with a metal grid, you can use C-clamps designed for lighting rigs to attach to the grid. You need to make sure the grid is actually supported — those tiles aren't structural, but the metal tracks are tied to the building structure with wires. It's not ideal for a heavy screen, but for something in the ten-to-fifteen-pound range, it can work.
The renter screen hierarchy is basically: floor-standing pull-up screen, portable tripod screen, or get creative with existing structure. None of them as clean as a ceiling-mounted pull-down.
That's the trade-off. Renting means accepting some compromises in the installation. But let me talk about what you actually gain with a screen, because it's significant enough that the hassle might be worth it.
Quantify the gain for me.
Let's start with brightness. A typical white wall has an effective gain of about zero point eight to zero point nine — it absorbs more light than it reflects. A basic matte white pull-down screen has a gain of one point zero to one point one. That's a twenty to thirty percent increase in perceived brightness. With a portable LED projector like the Nebula, which is already fighting an uphill battle on brightness — most top out around two hundred to three hundred ANSI lumens — that gain is meaningful.
You're not just getting a smoother surface. You're getting more light back to your eyes.
Then there's contrast. A wall, even a white wall, isn't truly white. It's slightly off-white, maybe with a hint of warm undertone from the paint. That tint affects color accuracy. A proper screen has a neutral white surface calibrated to reflect all wavelengths equally. Blacks look blacker because the screen isn't adding its own color cast to the image.
This is before we even get to ambient light rejection.
Ambient light rejecting screens — ALR screens — use a specialized surface that's essentially a microscopic sawtooth pattern. Light coming from below — from the projector — hits the angled surfaces and reflects toward the viewer. Light coming from above or the sides — from windows, lamps — hits the opposite angle and gets absorbed or reflected away from the viewer.
It's directional reflectivity. The screen knows where the light is coming from and treats it differently.
It's not smart — it's just geometry at a microscopic scale. But the effect is dramatic. A good ALR screen can make a projector watchable in a room with moderate ambient light, where a white wall would be completely washed out. The trade-off is that ALR screens typically have lower gain — around zero point six to zero point eight — and a narrower viewing angle. If you're sitting off to the side, the image gets dimmer faster than with a matte white screen.
For a bedroom setup where you're mostly watching from the bed, directly in front of the screen, ALR would be ideal. For a living room with seating spread out, matte white is more forgiving.
That's exactly the calculus. And for Daniel's use case — a bedroom projector, probably watched at night with low ambient light — a basic matte white pull-down screen would be a solid upgrade over projecting onto a wall, without the cost premium of ALR.
What does a decent pull-down screen actually cost?
For a hundred-inch diagonal, the sweet spot for home use, you're looking at somewhere between eighty and two hundred dollars for a basic matte white manual pull-down. Elite Screens and Silver Ticket are the two big names in that range. The Elite Screens Manual B series is around ninety dollars for a hundred-inch. Step up to a tab-tensioned screen — where tension lines on the sides keep the material perfectly flat — and you're at three hundred to five hundred. ALR pull-down screens start around four hundred and go up from there.
That's the one where the edges have those thin wires keeping everything flat?
Without tension, pull-down screens can develop edge curl over time — the sides start to curl inward because the material has been rolled up for extended periods. Tab-tensioned screens use cables or cords on both sides that pull the material outward, keeping it flat. They look better, they last longer, but they're more expensive and the tension mechanism adds complexity.
The edge curl is the screen equivalent of a projector's keystone problem. A small defect that, once you notice it, you can't un-see it.
It's worse with cheaper screens in humid environments. The screen material absorbs moisture, expands slightly, and when it's rolled up, that expansion has nowhere to go. You unroll it and the edges aren't straight anymore.
Jerusalem's dry enough that humidity probably isn't the issue. But heat might be — a rolled screen in a hot room for months, that material's going to develop a memory.
Heat sets the curl. If you're in a hot climate and the screen is mounted near a ceiling that gets warm during the day, you want tab-tensioned or you accept that you'll replace the screen every few years.
Let's talk about the motorized versus manual pull-down question. Is a motorized screen worth the premium?
For most people, no. A manual pull-down screen is a simple spring mechanism. You pull it down, it locks at various stops, you retract it by pulling slightly and letting it roll back up. There's almost nothing to break. A motorized screen adds a motor, a remote control or wall switch, and usually a limit adjustment for setting how far it drops. Motorized screens are quieter and smoother, and they look more impressive — you press a button and the screen descends gracefully. But the motor is a point of failure, and when it fails, the screen is stuck wherever it stopped.
The motorized screen is the pop-up headlight again. Satisfying when it works, infuriating when it doesn't, and you're paying extra for the privilege.
The one exception is if the screen is mounted somewhere hard to reach. If you've got a high ceiling and the screen is mounted above a staircase or something, a motorized screen with a remote makes sense because you can't physically reach the pull handle. But in a normal bedroom, manual is fine.
For renters, a floor-standing pull-up screen avoids the mounting problem entirely. What's the downside beyond floor space?
A pull-up screen has a base that sits on the floor and a telescoping handle that the screen material rises from. The base needs to be heavy enough that the whole thing doesn't tip forward when the screen is fully extended. Cheaper models are notoriously tippy. You also get a slight wobble if someone walks near it, because the floor transmits vibration. And if you have a toddler, the base is at floor level, which is exactly where they're looking for things to investigate.
The pull-up screen solves the wall-mounting problem but introduces new problems at floor level. There's no free lunch in projector setups.
Every choice is a trade-off between image quality, installation permanence, child safety, and aesthetics. You pick which two or three matter most and optimize for those.
What about ultra-short-throw projectors? Do they change the mounting equation at all?
They flip it completely. An ultra-short-throw projector sits inches from the wall, usually on a media console directly below the screen. No ceiling mount, no long cable runs, no tension rods. The projector is at furniture height. From a renter and child-safety perspective, it's almost ideal — except that the projector itself is now at grabbing height for a toddler.
You're trading the falling-from-above hazard for the sticky-fingers-on-the-lens hazard.
Ultra-short-throw projectors are more expensive and require a perfectly flat wall or a specialized screen, because any wall imperfection is magnified by the extreme projection angle. A tiny bump that would be invisible with a standard-throw projector becomes a visible shadow or distortion with UST.
The Nebula that Daniel has isn't ultra-short-throw, so that's a tangent. But it's worth noting for anyone starting from scratch.
For his specific situation — Nebula projector, bedroom, renter, toddler — I think the optimal setup is actually a high shelf on the wall opposite the bed, mounted into studs, with the projector placed on it with proper ventilation clearance. Cables run inside a paintable raceway down the wall. The shelf should be at least six feet off the ground — high enough that even standing on the bed, Ezra can't reach it. And pair it with a manual pull-down screen mounted to the same wall or the ceiling, depending on stud placement.
Six feet off the ground. That's a projector at art-gallery height.
It's extreme, but it's safe. And with the projector that high, you're going to need some vertical lens shift or you're accepting keystone correction. The Nebula Capsule has auto keystone, which helps, but remember the resolution tax.
The shelf solution works but costs you image quality. Everything costs something.
That's the theme of this whole conversation. Every mounting solution is a vector of compromises. Let me summarize what I think the decision framework looks like for someone in Daniel's position.
Give me the flowchart.
Step one: can you drill into the ceiling? If yes, ceiling mount into a joist with a model-specific or universal mount, run cables through the ceiling, install a recessed outlet. This is the gold standard for image quality, safety, and aesthetics. Total cost, including the mount and basic electrical work, maybe two to four hundred dollars if you hire someone, under a hundred if you do it yourself with a basic mount.
If you can't drill?
Step two: can you drill into the wall? If yes, high shelf mounted into studs, with cable raceway. This is the best renter compromise. You'll have small holes to patch when you move out, but stud-mounted shelves are straightforward to repair. Cost is maybe fifty dollars for a good shelf and brackets, another twenty for the raceway.
If even wall holes are off the table?
Step three: floor-to-ceiling tension rod with a projector platform. This is the best zero-holes option for image quality, but it's less child-safe and less aesthetically pleasing. Cost is around a hundred to a hundred fifty for a decent tension rod system designed for projectors or monitors.
Tripod stand or furniture clamp mount, with the understanding that these are temporary solutions and not child-safe. If there's a toddler in the house, these should only be used during supervised viewing and put away afterward. Which is a hassle, but it's the safe option.
Put away afterward. So basically, the projector becomes a special-event device, not an always-available setup.
Honestly, for a family with a young child, that might be the right call anyway. The less accessible the gear, the less temptation. Ezra's fixation with the projector is completely normal — it glows, it makes pictures, it's fascinating. Removing the temptation entirely by making the projector a thing that only appears for movie night is a legitimate strategy.
The projector as a ceremonial object. Brought out for occasions, then returned to its high shelf of safety.
It's not the most convenient approach, but it works. And it costs nothing.
Let's circle back to screens. If someone goes with the high-shelf approach for the projector, what's the corresponding screen setup?
For the screen, you've got two renter-friendly paths. One: a manual pull-down screen mounted to the wall above the projection wall, hitting studs. You'll have bracket holes to patch later, but again, that's manageable. Two: a floor-standing pull-up screen that you deploy only when watching. The floor-standing option pairs well with the ceremonial projector approach — everything comes out for movie night, everything goes away after.
If you're going floor-standing for both, you've essentially got a pop-up theater. Zero permanent installation, maximum flexibility, some setup and teardown each time.
Which sounds like a hassle, but it takes maybe five minutes once you've done it a few times. Pull up the screen, place the projector on its stand, plug in power, connect your source. For a family that watches movies a couple of times a week, that's totally manageable.
The image quality difference between a pull-down screen and a bare wall — is it noticeable enough that a casual viewer would care?
Even a casual viewer will notice that the image is brighter and colors are more accurate. They might not be able to articulate why, but they'll feel it. The image pops more. Text is sharper. Dark scenes have more visible detail. It's one of those upgrades that non-enthusiasts don't think about but immediately appreciate.
The upgrade you don't know you need until you see it.
For eighty to a hundred dollars for a basic manual pull-down, it's one of the best price-to-perceived-improvement ratios in home theater.
Alright, let me try to synthesize all of this into something actionable. For Daniel's specific situation — renter, toddler, bedroom, Nebula projector — the safest and most practical setup is probably a high shelf on the opposite wall, mounted into studs, projector placed with ventilation clearance, cables in a paintable raceway. Screen-wise, either a manual pull-down mounted above the projection wall, or a floor-standing pull-up if wall holes aren't acceptable. The whole thing can be installed in an afternoon, patched in an afternoon when moving out, and the projector is out of Ezra's reach.
That's the recommendation. And I'd add: if the shelf approach still feels too accessible, go fully ceremonial. Keep the projector in a closet, bring it out for movie night, use a floor-standing screen. It's not elegant, but it's safe and it works.
The projector in the closet. The final boss of renter-friendly home theater.
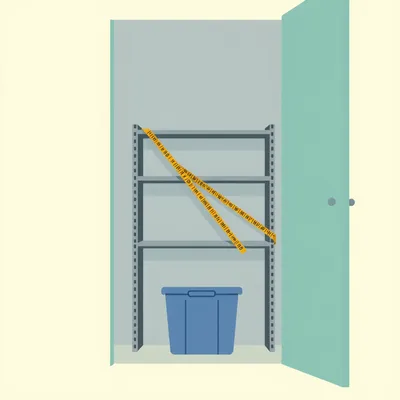
Sometimes the best mount is no mount at all.
That's almost profound. I hate it.
You're welcome.
Now: Hilbert's daily fun fact.
Hilbert: In sepak takraw, a team can commit what's called a "double touch" foul if the same player contacts the ball twice in succession — except on a block, where the double touch is legal. This exception creates a behavioral anomaly where players will intentionally frame a defensive move as a block rather than a dig, even when the mechanics are nearly identical, because the classification changes the legality of the play entirely.
The foul depends not on what you did, but on what you call what you did.
The semantic loophole as athletic strategy. I respect it.
This has been My Weird Prompts. Thanks to our producer Hilbert Flumingtop. If you want more episodes, find us at myweirdprompts.com or on Spotify. We'll be back with another one soon.
Until then, keep your projectors high and your toddlers curious.

")