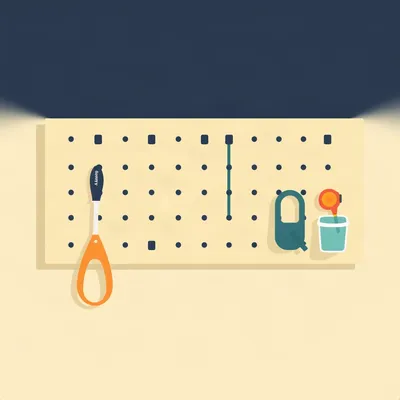
Daniel's been down the industrial supply rabbit hole, and he came out the other side with a flat-packed fiberboard rectangle and a list of grievances about proprietary hole patterns.

The circular pegboard standard is one of those things that feels inevitable until you realize IKEA looked at it and said, no, we'll make our own. And somehow that worked.
Here's what Daniel wrote in. He wanted a true industrial pegboard with the classic circular hole pattern. Couldn't find a supplier who'd sell him one piece of stainless steel without treating him like a factory procurement officer. So he gave up and bought the SKÅDIS board from IKEA. Took some hardware improvisation to attach it to his industrial shelving, but it's now mounted and serving as his main attachment surface. His frustration is the proprietary ecosystem, the unnecessary deviation from the standard circular pattern. But he also discovered the benefit: accessibility. You walk into IKEA, you buy one or a few, you're done. No supplier gatekeeping. His tool list is engraver, respirator, drill, drill bits, screwdrivers, tape measure, rolls of tape, laser measure, more screwdrivers. He's nearly filled the first fifty-six centimeter board and wants more. And he's realized that buying IKEA means joining a worldwide community of people hacking the same hardware. So his questions: what are useful tips for a first pegboard setup, what's the right way to scale to a full wall, what hardware goes behind an array of boards, is there a consumer equivalent to the louver panels with aluminum struts that professional workshops use, and how do you handle ergonomics when you've mounted the board high to keep it away from a one-year-old.
That last part is the one that actually hurts. He's got the board above his natural reach zone because Ezra's in the shared office. So every tool grab is a slight stretch. Multiply that by fifty grabs a day and it's a real ergonomic cost.
So let's start with why IKEA chose to break the circular pegboard standard, and what that really costs and buys you.
The industrial standard is circular holes on a one-inch grid, typically in steel or hardboard. The holes are round because the hooks are round wire. A standard hook has a little bent rod that goes into the hole and rests against the board. That's the whole system. It's been unchanged for decades because it works in factories and workshops where durability is the only thing that matters.
And the SKÅDIS board is fifty-six by fifty-six centimeters, fiberboard, with rectangular holes on a two-centimeter grid. The holes aren't just rectangles. They have a slightly keyhole-like shape, a little notch that the accessories clip into.
That notch is the clever part. IKEA didn't just punch square holes to be difficult. They designed the holes so that injection-molded plastic accessories can snap in without any metal wire at all. The accessory has a small plastic tab that slides into the slot and locks against the back of the board. No metal hooks, no bending wire, no rust. It's cheaper to manufacture, easier for a consumer to install, and it looks cleaner.
So the proprietary pattern isn't purely a money grab. It's a design decision that enables a whole accessory ecosystem built around plastic clips instead of wire hooks. The lock-in is real, but it's not arbitrary.
And there's a manufacturing angle. The SKÅDIS board is fiberboard with a laminated surface. You can punch that hole pattern in a flat sheet and ship it in a flat box. Industrial steel pegboard is heavy, it scratches, it needs a different supply chain. IKEA optimized for flat-pack retail, and the hole pattern followed from that.
The tradeoff is real though. Industrial pegboard accessories are standardized across dozens of manufacturers. You can buy hooks from one company, bins from another, and they all fit the same one-inch grid. With SKÅDIS, you're buying IKEA's accessories or you're 3D printing your own.
And the durability gap. Fiberboard doesn't love moisture. If Daniel's workshop is in a humid space, that board will eventually sag or swell. Steel pegboard would shrug that off. But for a home office in Jerusalem, which is dry most of the year, fiberboard is fine.
Now let's get into the weeds of how SKÅDIS actually works, and why the hack community has become the real product.
The hole spacing is two centimeters, which is tighter than the industrial one-inch grid. That means you can position accessories more precisely. A one-inch grid gives you about two and a half centimeters between holes. SKÅDIS gives you two. Tighter resolution means less wasted space when you're arranging small items.
And the accessory range is where IKEA put the thought. You've got simple hooks in a few lengths, containers that clip into the board, elastic cords for holding awkward shapes, small shelves, even a little clip for a roll of paper.
The containers are the unsung heroes. They snap in and stay put. On an industrial pegboard, a bin usually hangs from a wire bracket that wobbles. The SKÅDIS containers lock into the board and don't move when you grab something out of them.
Daniel's list is mostly hand tools and small items. The engraver, the laser measure, the rolls of tape. Those are all light enough for the plastic accessories. The drill is the one that makes me nervous.
The drill is exactly where the accessory system shows its limits. A Bosch GSB 120 LI is not a heavy drill, but it's heavier than a screwdriver. If you hang it on a standard SKÅDIS hook, you're trusting a plastic tab with the whole weight. IKEA does sell a larger hook that's rated for heavier items, but I'd still want to test it before putting a drill on it.
The community has solved that. IKEA Hackers, the big site, has thousands of projects built around SKÅDIS. People have designed 3D-printed clips that fit the square holes and hold specific tools. Drill holsters, screwdriver racks, battery holders.
That's the part I find interesting. The proprietary pattern that locks you into IKEA's accessories also gives the 3D printing community a precise, documented geometry to design against. The hole dimensions are consistent across every SKÅDIS board ever made. So a printed clip designed in Germany fits a board bought in Israel. That's a de facto open standard created by the community, even though IKEA never intended it.
The hack community is the real product. IKEA sells you the board, and then ten thousand strangers on the internet sell you, for free, the accessories IKEA didn't think to make.
There's a great example on IKEA Hackers from a couple years back. A family built a full wall of SKÅDIS boards for a child's room, combining toy storage with a desk area. Multiple boards mounted in a grid, with containers for small toys, hooks for dress-up clothes, a little shelf for books. It shows the scaling pattern that Daniel's asking about.
For a first board, the advice is simpler than people expect. Start with a plan. List your most-used tools, group them by frequency, and place the frequent ones at arm's reach. The board forces prioritization because fifty-six centimeters is not a lot of real estate.
Daniel's already done the hard part. He has a list. Engraver, respirator, drill, bits, screwdrivers, tape measure, tape rolls, laser measure. That's a tight, coherent set. The question is what goes where. And the rule I'd give him is: the things he grabs every single time he sits down go at elbow height, directly in front of where he stands. The things he grabs occasionally go to the edges.
His board is mounted high because of Ezra. So his elbow height is already compromised. We'll get to that. But the principle still applies: most-used items in the prime zone, wherever that zone happens to be.
The other first-board tip is to use vertical stacking for long tools. Screwdrivers and tape measures can hang vertically and take up very little horizontal space. A row of screwdrivers hanging by their clips uses maybe ten centimeters of width. If you lay them flat on a shelf, they use triple that.
Shallow containers for small parts. Drill bits, screws, the little hex keys that come with everything. Those go in the small SKÅDIS containers. The transparent ones are better because you can see what's inside without pulling it off the board.
And reserve the top row for rarely used items. The board is fifty-six centimeters tall. If you're reaching up to the top row, that's for the stuff you need once a month. The respirator might actually go there for Daniel, since he doesn't need it every time he picks up a screwdriver.
The fifty-six centimeter width forcing you to prioritize is a feature, not a bug. A full wall of pegboard with no plan becomes a museum of tools you forgot you owned. A single board makes you choose. And choosing is what organization actually is.
The elastic cords are another underrated accessory. For irregular shapes, like the respirator or a roll of tape, a hook doesn't work well. But an elastic cord stretched across a section of board holds things against the surface. It's the difference between a tool wall and a tool avalanche.
Daniel mentioned he's almost filled the first board and wants more. So let's talk about what happens when one board isn't enough.
This is where the real engineering starts. One board is easy. You screw it into studs or anchors and you're done. Multiple boards in a grid is a different problem. They have to align perfectly or the seams look terrible and the accessories don't line up across the gap.
And the weight. One board with tools is manageable. Four boards with tools is a lot of load. If you're just screwing each board directly into drywall anchors, you're trusting each anchor independently. That's fine until it isn't.
Professional workshops solve this with louver panels backed by aluminum struts. The struts mount to the wall first, and the panels clip onto the struts. The load is distributed across the entire rail system, not concentrated at individual screw points. And the panels can slide horizontally along the struts for infinite adjustment.
The consumer equivalent that gets closest is Elfa's utility board system. Aluminum rails mount to the wall, and boards clip onto the rails. You can reposition the boards without drilling new holes. It's the same idea as the industrial louver system, just scaled down for home use and wrapped in a consumer brand.
Elfa is pricey though. The rails are the expensive part, and the accessories are proprietary, just like SKÅDIS. But the mechanical idea is sound. The rail carries the load, the board just hangs on it.
The DIY gold standard is the French cleat system. You cut a strip of wood at a forty-five degree angle, mount one half to the wall, the other half to the back of your board, and the board hangs on the wall cleat. It's strong, it's adjustable, and it distributes load across the whole width.
French cleats require woodworking skills. You need to cut a consistent angle, which means a table saw or a very steady hand with a circular saw. If you don't have that, you can buy pre-cut French cleat strips, but they're not as common as they should be.
Slatwall is the retail option. Medium-density fiberboard with horizontal grooves cut into it. It's what stores use for display walls. Hardware stores sell it in panels, and it accepts a wide range of hooks and bins that slide into the grooves. The downside is the grooves are a fixed spacing, so you don't get the fine adjustment of a French cleat.
For a SKÅDIS wall specifically, the cleanest approach is a continuous horizontal rail mounted to the wall, then attach each board to that rail. You can use an aluminum channel or a simple wooden cleat. The rail ensures all the boards sit at exactly the same height, and you can slide them horizontally to adjust spacing.
Or you mount a plywood backing panel first, painted to match the wall, and then screw the SKÅDIS boards into the plywood anywhere you want. The plywood becomes a universal mounting surface. It's more work up front, but it gives you total freedom to reposition boards later without finding a stud every time.
The plywood approach also solves the drywall problem. If you're mounting four boards with tools on them, drywall anchors are the weak point. A sheet of plywood screwed into the studs spreads the load across the whole wall. Then the pegboards are just screwed into the plywood, and each screw is holding a few kilos at most.
Daniel's boards are going onto industrial shelving, not drywall, so he's already got a solid mounting surface. But the alignment question still applies. A rail or a cleat would let him add boards in a row without each one being a separate measuring project.
Now the ergonomics. The industrial world follows biomechanics. Tools should be at waist-to-shoulder height. The most-used items at elbow height, which is roughly ninety to one hundred ten centimeters from the floor for a standing adult. That's the zone where your arm doesn't have to reach up or bend down.
Daniel's board is mounted higher than that because Ezra's in the office. So he's already outside the ideal zone. Every grab is a small shoulder lift. It's not a huge deal for a screwdriver, but it adds up.
The compensation strategy is to group heavy tools lower, even if lower is still above Ezra's reach. The drill should be on the lowest row of the board, not the highest. You want the heavy items where gravity is working with you, not against you. Lifting a drill down from shoulder height is fine. Lowering it from above your head is a strain.
And use a step stool for the top row. If the board is mounted high enough that the top row is above your reach, a small step stool solves it. It's not elegant, but it's better than stretching on tiptoes forty times a day.
The other option is a lockable cabinet below the board for hazardous items. If the engraver has a sharp bit or the drill bits are in a case that could open, those go in a cabinet with a childproof latch. The board holds the safe stuff, the cabinet holds the dangerous stuff.
For a shared space, there's a teaching angle. Mount the board high for safety, but designate a small lower zone that Ezra can access under supervision. A tape measure on a hook at his height, a plastic container with a few safe items. It turns the constraint into a controlled introduction to tools.
Ezra's one. He's not going to be using a tape measure independently. But he's watching Daniel work, and having a zone that's his, even if it's just a plastic hook with a colorful cloth or a soft brush, makes the board a shared object instead of a forbidden one.
The forbidden object problem is real. If the whole board is off-limits, it becomes the most interesting thing in the room. If part of it is his, the rest is easier to leave alone.
The industrial biomechanics literature says the acceptable range is waist-to-shoulder, with the sweet spot at elbow height. For a seated workspace, that changes. If Daniel is sometimes sitting at a desk next to the board, the elbow height drops. But for a tool wall, standing is the default posture.
The other ergonomic principle is frequency mapping. The tools you use every day go in the prime zone. The tools you use once a week go at the edges. The tools you use once a month go at the top. It's not just about reach, it's about not having to move your body for the common operations.
Daniel's list maps cleanly. Screwdrivers and tape measure are daily items. Drill and bits are probably several times a week. Engraver and respirator are project-specific. So the daily items go center, the project items go edges and top.
And the laser measure. That's the kind of tool that's small and fiddly. It needs a dedicated spot where it can't get knocked off. A container or a specific clip, not just a hook.
The 3D printed clip community has solved that too. There are designs for laser measure holsters that clip into SKÅDIS holes and hold the tool securely. That's the advantage of the standardized hole geometry. Someone has already designed the exact clip you need.
Before we wrap, Hilbert's been quiet, and I have a feeling he has a story about pegboard that's about to surface.

He's right about the clips.
The 3D printed ones?
IKEA's own clips. They're fine for a sponge. Put a drill on one and it'll hold. Until it doesn't. I had a circular saw fall off a pegboard in eighty-seven. Community theater. We were building a set for Guys and Dolls. The props master hung a circular saw on a standard hook because it was there and the bench was full. Hook bent. Saw came down. Missed my foot by about four inches. Put a dent in the stage floor you could lose a quarter in.
A circular saw on a pegboard hook.
It was not my decision. I was the one who had to explain to the director why the floor had a new feature. He was not interested in the metallurgy.
That's the failure mode with wire hooks. They don't break suddenly. They bend slowly, and then the tool slides off. The SKÅDIS plastic clips are actually better in one way. They fail by cracking, not bending. So you see the crack before the tool falls.
You see it if you look. Most people don't look. They hang the drill and walk away. Six months later the clip's been cracked for five and a half.
The printed clips are the answer then.
My nephew does the 3D printing. He made me a holder for my stud finder. Fits the square holes. I've had it two years. It's stronger than anything IKEA sells. The plastic he uses is the stuff they make car bumpers out of. Printed solid, not hollow. Cost about forty cents in material.
That's the thing about the community designs. They're often over-engineered because the designer is making it for themselves. IKEA is optimizing for cost and shipping weight. The hobbyist is optimizing for not having their tool fall off the wall.
My brother-in-law is a cabinetmaker. He's had a French cleat wall in his shop for thirty years. He thinks pegboard is for people who don't own a table saw. I don't say that to be unkind. He's just particular. He'd tell Daniel to skip the SKÅDIS boards and build a proper cleat wall with custom holders.
And would he be wrong?
For a cabinetmaker with a full shop, no. For a home office with a one-year-old, yes. The SKÅDIS board is flat, it's light, and if something falls off it's a screwdriver, not a chisel. The cleat wall is for a different room.
The cabinetmaker's perspective is the industrial one. Maximum strength, maximum adjustability, no concern for aesthetics or child safety. Daniel's constraints are different.
And the brother-in-law is not to be trusted?
He's a fine cabinetmaker. But he once told me a biscuit joiner was a waste of money. Two years later he bought one and told me it was essential. So I take his opinions with a grain of salt.
The tool wall conversation always comes back to this. The right system depends on what you're storing and who else is in the room. A cabinetmaker with a locked workshop has different needs than a father in a shared office.
The thing I keep wondering about is whether IKEA ever opens the pattern. The 3D printing community has already reverse-engineered it. The hole dimensions are documented. Anyone can design an accessory. IKEA could embrace that, publish the spec, and become the standard instead of the alternative.
They won't. The accessory sales are the margin. The board is cheap, the hooks and containers are where the profit lives. If they open the spec, they invite competitors to make accessories that fit their boards. They'd sell fewer hooks.
But the community is already making accessories. The only difference is IKEA isn't profiting from them. If they published the spec and sold a licensing program, they'd capture some of that value.
My nephew would never pay a license fee. He'd just keep printing.
That's the reality. The proprietary pattern created a de facto open standard by accident. The community treats it as open. IKEA treats it as closed. The tension is unresolved and probably will be.
Daniel's wall project is the interesting test case. If he builds a full wall of SKÅDIS boards with a rail system behind them, he's combining consumer accessibility with industrial mounting principles. That hybrid approach might be the real answer for home workshops.
It's the same pattern we see everywhere. The consumer product is the entry point, the community is the expansion, and the industrial knowledge is the upgrade path. Daniel started by trying to buy industrial, couldn't get access, and ended up building a hybrid system anyway.
The open question is whether that hybrid becomes the standard for home workshops. As 3D printing gets more accessible, the proprietary accessory problem shrinks. The board itself is just a board. The ecosystem is what people build around it.
And if IKEA ever does open the spec, the SKÅDIS board becomes the USB of tool storage. Every accessory manufacturer designs to it. That would be a interesting shift.
This has been My Weird Prompts. Thanks to Hilbert Flumingtop for producing.
If you've built a pegboard wall, we want to see it. Email us at show at my weird prompts dot com with photos and your layout.
We'll be back soon.